
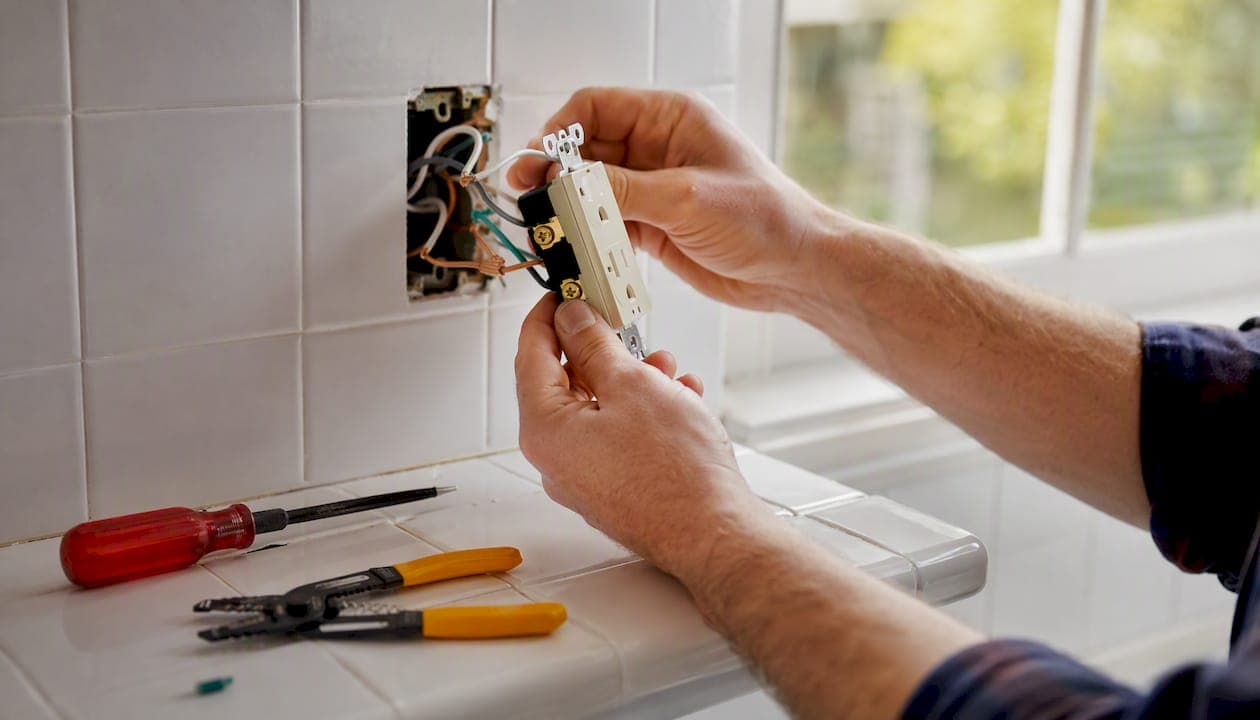
Most homeowners can handle a standard duplex outlet replacement themselves. The switch outlet replacement steps are straightforward: kill the circuit at the breaker, confirm the outlet is dead with a non-contact voltage tester, then follow the wiring sequence below. The whole job typically runs 30–45 minutes.
Before you touch a single wire, do these three things:
- Turn off the correct circuit at your breaker panel and flip the outlet switch to confirm it's dead.
- Verify with a voltage tester — twice. A tester that reads zero on a live outlet is a broken tester.
- Remove metal jewelry, put on safety glasses, and wear rubber-soled shoes.
Stop and call a licensed electrician or Maddladder immediately if the outlet feels hot, smells like burning, has brittle or aluminum wiring, or feeds multiple circuits you can't identify.
Pro Tip: Never rely on a wall switch to cut power to an outlet. Only the breaker guarantees the circuit is dead.
Key Takeaways
Safe outlet replacement comes down to one rule above all others: confirm the circuit is dead with a voltage tester—test multiple times and on a known live outlet—before touching any wire, every single time.
| Point | Details |
|---|---|
| Kill power and verify | Turn off the breaker and confirm zero voltage with a non-contact tester before touching wires. |
| Use screw terminals | Hook wires clockwise on screw terminals; avoid back-stab connectors, which loosen over time. |
| Pigtail multiple cables | When more than one cable feeds the box, splice pigtails to preserve circuit continuity. |
| Test after installation | Use a plug-in outlet tester to confirm correct polarity and grounding before calling the job done. |
| Call Maddladder for red flags | Hot outlets, burning smells, aluminum wiring, or repeated breaker trips need a licensed pro. |
Table of Contents
- What tools and PPE do you need before you start?
- Switch outlet replacement steps: the full procedure
- Special cases that change the procedure
- How to test the new outlet and fix common problems
- NEC basics every DIYer should know
- When should you stop DIYing and call a pro?
- How to dispose of old outlets safely
- An honest note on DIY electrical work
- Maddladder handles the jobs that go beyond a simple swap
- Sources
What tools and PPE do you need before you start?
Gather everything before you open the wall. Stopping mid-job to hunt for a screwdriver with live wires exposed is how accidents happen.
| Tool / Item | Purpose |
|---|---|
| Non-contact voltage tester | Confirms circuit is dead before touching wires |
| Outlet tester (plug-in) | Verifies polarity and grounding after installation |
| Insulated flathead and Phillips screwdrivers | Removes faceplate and device screws |
| Wire stripper | Strips fresh insulation on cut wire ends |
| Needle-nose pliers | Forms clockwise J-hooks on wire ends |
| Wire nuts (assorted) | Splices pigtails when multiple cables are present |
| Electrical tape | Wraps exposed splices for added insulation |
PPE checklist: safety glasses, insulated gloves, closed-toe rubber-soled shoes, no rings or bracelets.

A basic non-contact voltage tester typically costs around $15–$25 and is available at most hardware stores. A plug-in outlet tester is usually available for under $15 at many hardware stores. Both are worth owning permanently. According to True Value Hardware, the full tool list for this job includes an electrical tester, wire stripper, needle-nose pliers, insulated screwdrivers, and wire connectors.
Pro Tip: Test your voltage tester on a known live outlet before using it, then confirm the outlet is dead and test several times at the work location. A faulty tester that reads zero on a live wire is the most dangerous tool in the box.
Switch outlet replacement steps: the full procedure
A clean replacement on a standard 15A duplex outlet takes about 30–45 minutes. The Spruce confirms this is well within reach for most DIYers who follow safety steps and use the right testers. Here's the exact sequence:
- Kill the circuit. Flip the correct breaker at your panel. Flip the outlet's wall switch if there is one.
- Verify power is off. Hold your non-contact voltage tester near the outlet slots. No beep or light means no voltage. Test twice.
- Remove the faceplate. One center screw. Set it aside.
- Unscrew the device. Two screws hold the receptacle to the electrical box. Pull the device out gently — don't yank.
- Photograph the wiring. Before disconnecting anything, take a clear photo of every wire and which terminal it's on. This single step prevents most rewiring mistakes.
- Disconnect the old wires. Loosen terminal screws and remove each wire. If wires are back-stabbed (pushed into holes), insert a small flathead into the release slot.
- Cut and restrip wire ends. iFixit recommends cutting off old nicked or bent wire ends and stripping about 3/4 inch of fresh insulation for a clean, reliable connection.
- Form clockwise J-hooks. Use needle-nose pliers to bend each wire end into a clockwise hook. When you tighten the screw, it closes the loop rather than pushing the wire out.
- Attach wires to the correct terminals. Black (hot) wire goes to the brass screw. White (neutral) goes to the silver screw. Bare copper or green wire goes to the green ground screw.
- Tighten all terminal screws firmly. A loose connection is the leading cause of outlet failure and heat buildup.
- Fold wires back and mount the device. Press wires into the box carefully, seat the receptacle, and drive the mounting screws.
- Replace the faceplate.
- Restore power and test. Flip the breaker back on, then plug in your outlet tester.
Multiple cables in the box? Use pigtails. Bob Vila's wiring guide explains that when more than one cable feeds a box, you splice short pigtail wires to the incoming conductors and connect the pigtail ends to the device. This preserves circuit continuity so downstream outlets still work.
Pro Tip: Always use screw terminals, never back-stab connectors. The Spruce's wiring guide notes that screw terminals make more secure, longer-lasting joints — back-stab connectors loosen over time and are a common source of intermittent failures.
Special cases that change the procedure
GFCI outlets
A GFCI receptacle has two sets of terminals: LINE and LOAD. The incoming power always connects to LINE. If you're only replacing the GFCI itself (not extending protection to downstream outlets), connect only to the LINE terminals and cap the LOAD terminals with the provided caps. Lowe's installation guide warns that swapping line and load disables the GFCI's protection and can cause unexpected behavior. After wiring, press the RESET button before testing.
Aluminum wiring
If the wires in your box are silver-colored aluminum rather than copper, stop. Aluminum wiring requires special devices rated AL-CU and anti-oxidant compound. The arcing and fire risk from improperly handled aluminum wiring is serious. Call a licensed electrician.
Switches vs. outlets
Swapping a single-pole light switch follows a similar sequence, but there's no neutral wire involved — only two hot wires (or a hot and a switched hot). Three-way and four-way switches involve travelers and are significantly more complex. If you open the box and see three or more wires on the switch (not counting ground), call a pro.
When to stop and call a professional: The outlet feels warm or hot to the touch. There's a burning smell. You find charred or melted insulation. Multiple hot wires are present and you can't identify which circuit they belong to. The breaker trips again immediately after you restore power. Any of these signals means the problem is deeper than the device itself.
Pro Tip: Snap a photo of the wiring label inside your breaker panel door before you start. It helps you find the right circuit faster and gives you a record if something looks off later.
How to test the new outlet and fix common problems
Once power is restored, plug your outlet tester into the new receptacle. A correctly wired 15A or 20A outlet shows two amber lights and one green light on most standard testers — check your tester's legend to confirm. True Value's guide recommends testing hot-to-neutral, hot-to-ground, and neutral-to-ground to catch hidden faults.
If the outlet doesn't work or the tester shows an error:
- Check the breaker first. A tripped breaker looks like it's in the middle position, not fully ON. Reset it firmly.
- Re-examine every terminal screw. A wire that looks seated can still be loose. Turn off the breaker again, pull the device out, and tighten each screw.
- Confirm wire placement. Black on brass, white on silver, bare copper on green. Swapped neutral and hot is the most common DIY wiring error.
- Check for a tripped GFCI upstream. If the outlet is on a circuit protected by a GFCI elsewhere in the house, that GFCI may have tripped. Find it and press RESET.
- Inspect wire ends. A wire that pulled out of its hook during mounting is easy to miss. Restore power only after re-checking every connection.
If the faceplate feels warm after a few minutes, or you smell anything unusual, turn the breaker off immediately and call a professional. Heat at the plate means resistance in the connection — that's a fire risk, not a nuisance.
NEC basics every DIYer should know
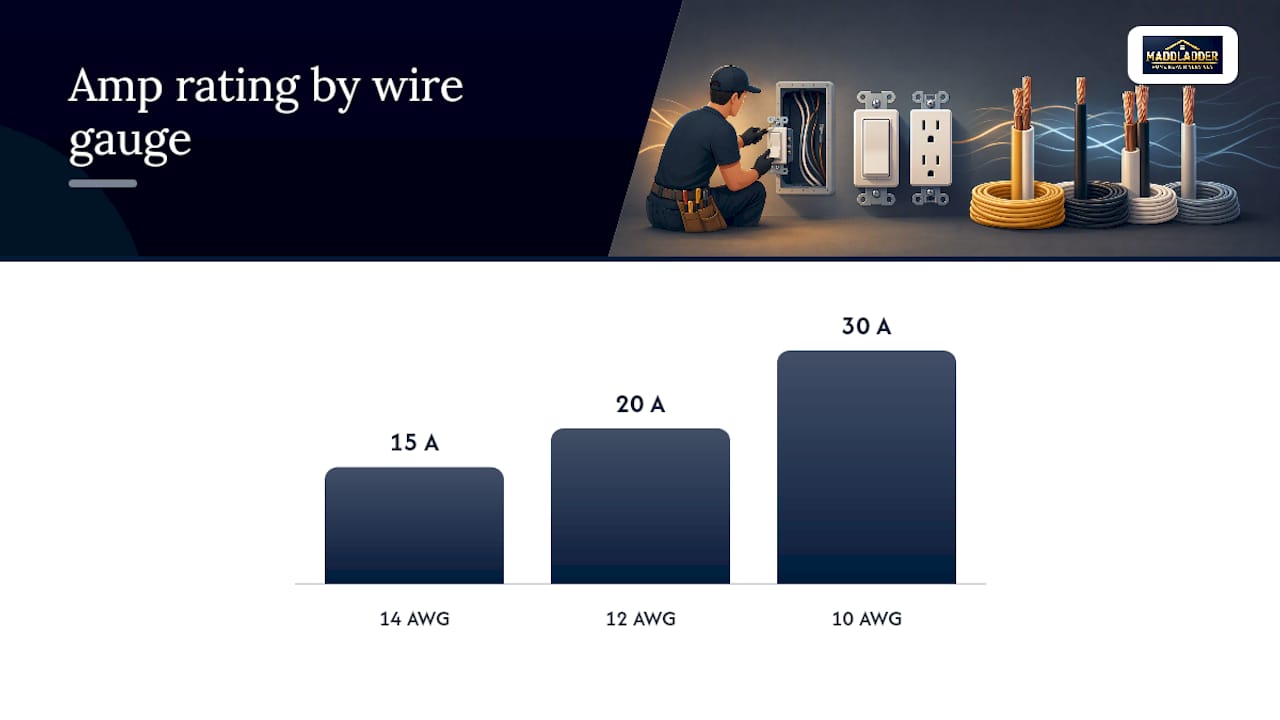
Wire gauge and receptacle amp rating must match. A 14-gauge wire circuit is rated for 15A; a 12-gauge circuit handles 20A. Installing a 20A receptacle on a 14-gauge circuit doesn't upgrade the circuit — it just removes the protection the 15A rating provided.
| Wire Gauge | Circuit Amperage | Correct Receptacle |
|---|---|---|
| 14 AWG | 15A | 15A duplex |
| 12 AWG | 20A | 20A or 15A |
| 10 AWG | 30A | Requires dedicated device |
A few other non-negotiables:
- UL listing: Only install receptacles with a UL mark. This confirms the device meets minimum safety standards.
- Box fill: An overcrowded electrical box is a code violation and a safety hazard. If the box is already packed with wires, a permit and an electrician may be required.
- Permits: Most jurisdictions allow homeowners to replace like-for-like receptacles without a permit. Adding new circuits, moving outlets, or upgrading from 15A to 20A typically requires one. Check your local Kansas City code requirements before you start.
For a broader look at what upgrades make sense for your home, the minor electrical upgrade options guide covers GFCI, tamper-resistant, and smart outlet choices worth considering.
When should you stop DIYing and call a pro?
Some jobs look like a simple outlet swap until you open the box. Stop the DIY approach and contact a licensed electrician or Maddladder if you encounter any of these:
- The outlet or faceplate is warm or hot to the touch
- A burning smell comes from the outlet or box
- You find charred, melted, or brittle insulation on the wires
- The box contains more than two cables and you can't trace the circuit
- The wiring is silver-colored aluminum
- The breaker trips repeatedly after you restore power
- You find a double-tapped breaker or unfamiliar wiring configuration
Maddladder's licensed handyman team serves the Kansas City metro area with minor electrical repairs including outlet and switch replacements, GFCI upgrades, and smart-home device installations. Free estimates, fast scheduling, and no guesswork about whether the job is safe to proceed.
Pro Tip: Save your wiring photos and note the breaker number on a piece of tape inside the panel door. Future repairs — yours or a pro's — go faster with that record.

How to dispose of old outlets safely
Old receptacles are small, but they contain plastic, brass, and copper — materials that shouldn't go straight into household trash in most municipalities.
The simplest option: check whether your local waste hauler accepts small electrical components in curbside recycling. Many do, provided the item is clean and free of attached wiring. If not, take it to a municipal household hazardous waste (HHW) drop-off or an e-waste collection event. Home Depot and Best Buy locations in the Kansas City area periodically run recycling events for small electrical items.
Strip any attached wire scraps before disposal. Bare copper wire has scrap value and can go to a metal recycler. Electrical tape and wire nuts go in regular trash. Never burn old wiring or receptacles — the plastic insulation releases toxic fumes.
An honest note on DIY electrical work
The steps in this guide work reliably for a standard like-for-like outlet swap. Where homeowners get into trouble is assuming every outlet job is standard. A box with three cables, a mystery red wire, or wiring that predates 1980 is not a standard job — and the cost of getting it wrong is measured in house fires, not inconvenience.
The most common mistake I see? Skipping the voltage tester step or not verifying the tester works first because the breaker was "definitely" the right one. Breakers are mislabeled in a surprising number of homes. Test a live outlet, then test the one you'll work on—every time.
Maddladder's electrical repair services cover the Kansas City metro area for exactly these situations — the jobs that start as a DIY project and reveal something that needs a licensed eye. Free estimates, no pressure, and a clear explanation of what's actually going on in your walls.
Maddladder handles the jobs that go beyond a simple swap
When the outlet swap reveals something unexpected — three cables, aluminum wiring, a charred box, or a breaker that won't stay on — the right move is a professional inspection, not a second attempt.
Maddladder serves Kansas City metro homeowners, landlords, and property managers with licensed handyman electrical work: outlet and switch replacements, GFCI upgrades, smart-outlet and video doorbell installations, and full minor electrical repairs. One-time jobs start at $75/hour, and subscription maintenance plans are available for property owners who want ongoing coverage. Free estimates, fast scheduling, and a licensed team that explains exactly what's in your walls before touching anything.
Book a free estimate and get a clear answer on whether your outlet job is a quick swap or something that needs more attention.
Sources
Verify any step against these primary references before you start:
- How to Replace an Electrical Outlet: A Step-by-Step Beginner Guide
- How to Wire an Outlet From Another Outlet (or Replace an Existing Outlet)
- How to Replace a Light Switch or Electrical Outlet | True Value Hardware
- Electrical Outlet-Receptacle Replacement (iFixit guide)
This article provides general information for educational purposes. For wiring configurations you can't identify, aluminum wiring, or any situation involving repeated breaker trips or signs of heat damage, consult a licensed electrician before proceeding.