TL;DR:
- Many common electrical issues, like replacing outlets or resetting breakers, are safe for homeowners with proper precautions.
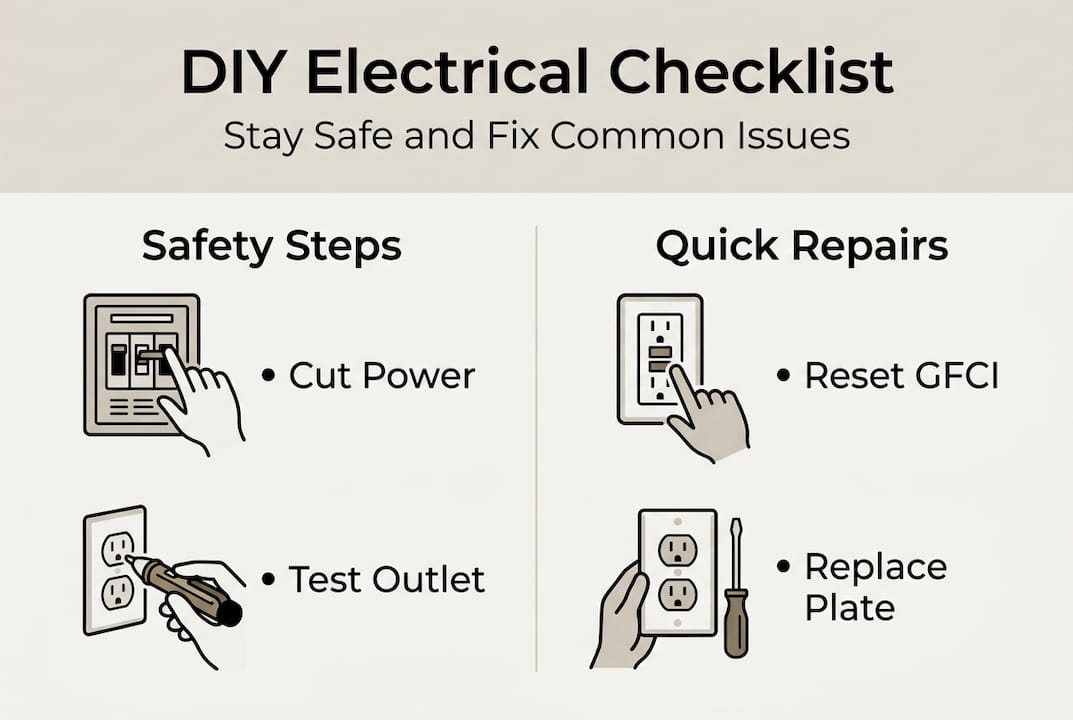
- Essential tools include voltage testers, screwdrivers, wire strippers, and insulated gloves to ensure safe and efficient repairs.
- Homeowners should recognize limits and call licensed electricians for complex wiring or persistent electrical problems to prevent fire risks.
Around 46,000 to 51,000 home electrical fires break out every year across the US, and many start with problems that homeowners could have caught early. For Kansas City homeowners tired of waiting on a repair crew for a dead outlet or a tripped breaker, knowing what you can safely fix yourself is one of the most practical skills you can develop. This guide walks you through the safety rules, the right tools, and the step-by-step repairs that are genuinely within reach for most people. You will also learn exactly where to stop and hand the job to someone licensed.
Table of Contents
- Understanding DIY electrical repairs: Safety and limitations
- Must-have tools and prep for electrical fixes
- Step-by-step troubleshooting and basic repairs
- Troubleshooting advanced scenarios and avoiding fire risks
- Why DIY electrical repairs are empowering—and where they shouldn't go
- Expert support for electrical repairs in Kansas City
- Frequently asked questions
Key Takeaways
| Point | Details |
|---|---|
| Safety first | Always turn off power, use a tester, and know your limits before beginning any repair. |
| Gather essential tools | Have the correct tools and PPE ready for any electrical job to minimize mistakes and danger. |
| Follow clear steps | Systematic troubleshooting for outlets and fixtures prevents guesswork and saves time. |
| Know when to call a pro | If repairs involve wiring, panels, or recurring faults, hire a Kansas City electrician for guaranteed safety. |
Understanding DIY electrical repairs: Safety and limitations
Not every electrical problem needs a professional, but not every one is safe to tackle on your own either. Understanding that line before you pick up a screwdriver is what keeps a simple fix from turning into a disaster.
Here is a breakdown of what falls into each category:
Safe for most homeowners to DIY:
- Replacing a standard outlet or switch (with power off)
- Swapping out outlet covers and light switch plates
- Resetting a tripped breaker or GFCI outlet
- Tightening a loose outlet using shims
- Replacing a light fixture with a matching one
Leave this to a licensed electrician:
- Any wiring behind the walls
- Panel upgrades, replacements, or additions
- Aluminum wiring repairs
- Repeated breaker trips or unexplained power loss
- Anything involving the main service entrance
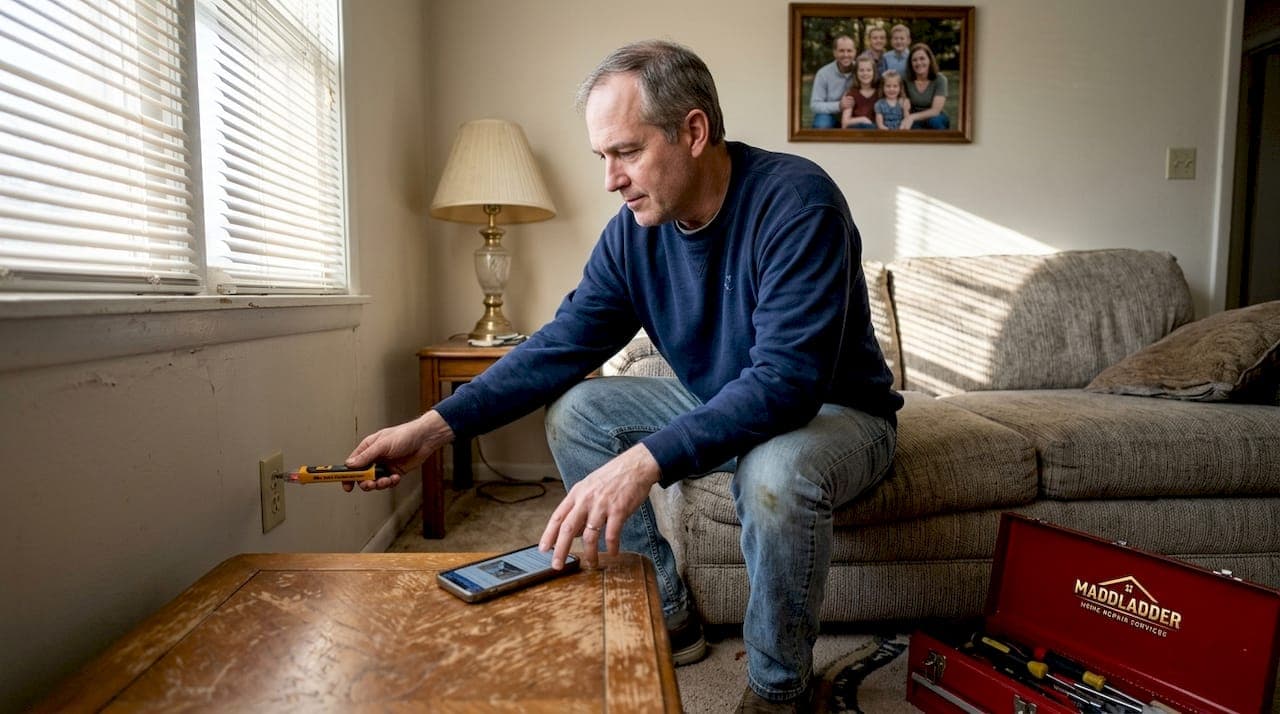
As a starting point for any repair, the live-dead-live safety method is the gold standard: turn off power at the breaker, confirm the circuit is dead with a voltage tester, complete your work, then verify power restores correctly. Always use insulated tools and rubber gloves.
Safety first: Never assume a wire is dead just because you flipped the breaker. Mislabeled panels are common in older Kansas City homes built before modern code updates. Always verify with a non-contact voltage tester before touching any wire.
Pro Tip: Before you even open an outlet box, take a photo of the wiring with your phone. That snapshot becomes your reference for putting everything back exactly the way it was.
The financial case for doing safe basics yourself is real. A routine electrical repair that takes a pro 30 minutes can run $100 to $200 with a service call fee. Mastering the simple stuff means you call in a pro only when the situation genuinely requires one. For anything beyond basic fixes, plumbing and electrical services from a licensed team protect both your safety and your home's value. Learning your own limits is the part that actually saves money long term.
Kansas City homes, especially those built before 1990, often have wiring quirks that make it even more important to know when to step back. Older panels, outdated outlets, and sometimes a mix of aluminum and copper wiring show up frequently in midtown and older suburban neighborhoods. If you notice any of those during a repair, stop and call a pro. Being familiar with KC DIY safety upgrades helps you spot these warning signs before they become urgent.
Must-have tools and prep for electrical fixes
Showing up to a repair without the right tools is like trying to cook dinner without a knife. You will either make a mess or give up halfway through. Getting organized before you start is what separates a clean repair from a frustrating one.
Your essential electrical repair toolkit:
- Non-contact voltage tester (non-negotiable, use it every single time)
- Digital multimeter
- Flathead and Phillips screwdrivers (insulated handles only)
- Needle-nose pliers
- Wire strippers
- Insulated rubber gloves
- Flashlight or headlamp
- Electrical tape
- Outlet tester with GFCI indicator
According to this Old House safety guidance, a voltage tester and multimeter are the two tools that matter most because they remove guesswork from the equation entirely. Guesswork is what gets people hurt.
Here is a quick reference table to match tools to common repair tasks:
| Task | Primary tools needed |
|---|---|
| Replacing an outlet | Voltage tester, screwdrivers, wire strippers |
| Resetting a GFCI | Outlet tester (optional), your hands |
| Replacing a light switch | Voltage tester, screwdrivers, needle-nose pliers |
| Checking for a dead circuit | Multimeter or voltage tester |
| Tightening a loose outlet | Screwdrivers, outlet shims |
Setting up your workspace safely:
- Clear the area around the outlet or switch before starting
- Make sure the room is well lit, a headlamp keeps both hands free
- Keep a dry rubber mat underfoot if your floor is concrete or tile
- Have your phone nearby in case you need to look something up or call for help
- Turn off the breaker and post a note on the panel so no one flips it back on while you are working
Preparation is not just about safety. It speeds up the repair and reduces the chance of mistakes. Many errors happen because someone was rushing, poorly lit, or missing a single tool mid-job. The Kansas City DIY repairs guide covers workspace setup across multiple repair types if you want a broader reference.
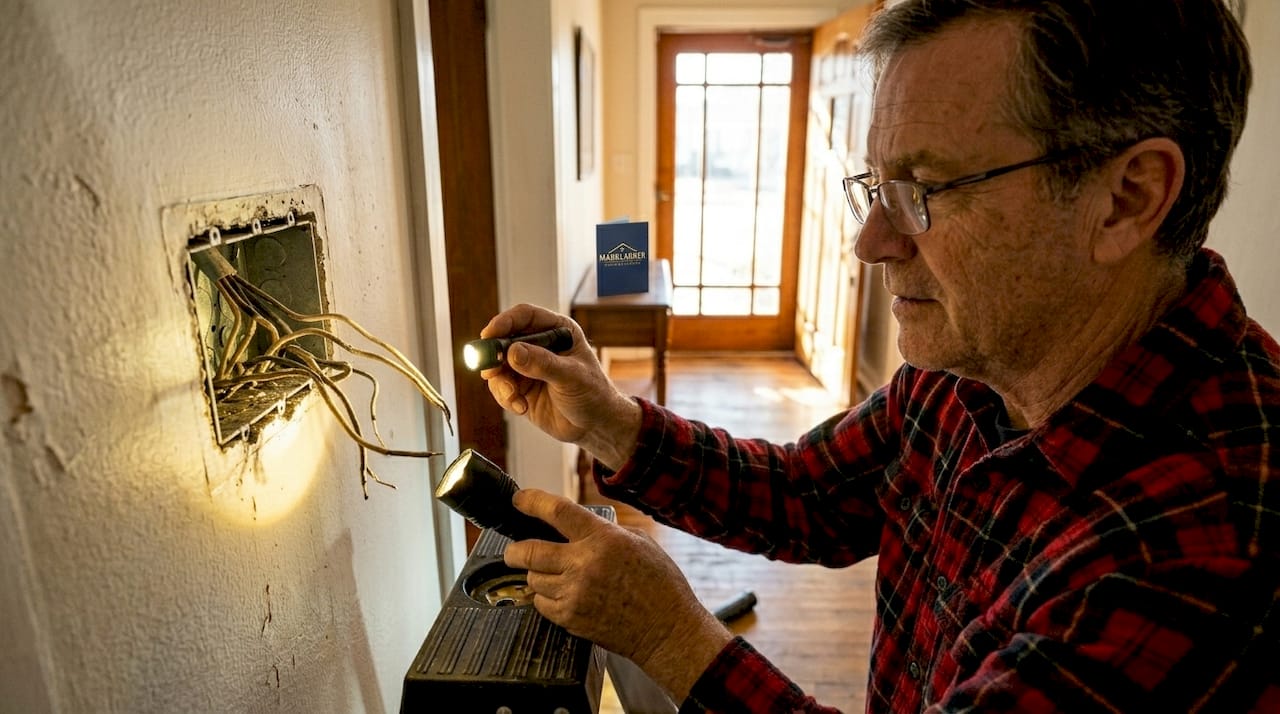
One often overlooked step: check the age and condition of the wires inside the box before you do anything else. Brittle insulation, scorch marks, or discolored wire ends are signals that the repair goes beyond a simple swap.
Step-by-step troubleshooting and basic repairs
Dead outlets are one of the most common calls we hear about from Kansas City homeowners, and most of the time the fix is simpler than expected. Here is a reliable sequence for diagnosing and repairing them.
Troubleshooting a dead outlet, step by step:
- Check the breaker panel. Look for any breaker that has flipped to the middle position and reset it by pushing it fully off, then back on.
- Find and reset any upstream GFCI outlets in kitchens, bathrooms, and garages. One tripped GFCI can knock out several outlets in different rooms.
- Plug a known working device into the outlet to confirm it is truly dead and not just a device issue.
- Turn off the breaker, verify power is off with your tester, then remove the outlet cover and inspect for loose wires, burnt insulation, or corrosion.
- Unplug any heavy loads on the circuit to rule out a simple overload before assuming there is a wiring fault.
Common mistake: Most people check the breaker and give up. The real culprit is often a GFCI outlet in another room that has tripped. A single GFCI in a bathroom can control outlets in the hallway, bedroom, and even outside. Always check every GFCI on the same floor before concluding you have a wiring problem.
Pro Tip: Use a plug-in outlet tester with a GFCI indicator light. It tells you instantly whether the outlet is wired correctly and whether it is being protected by an upstream GFCI, which saves you from hunting through every bathroom in the house.
Here is a comparison of common outlet symptoms and what they usually mean:
| Symptom | Likely cause | DIY or pro? |
|---|---|---|
| Outlet completely dead | Tripped GFCI or breaker | DIY |
| Outlet sparks when plugging in | Worn contacts or loose wiring | DIY (inspect) or Pro |
| Outlet warm to the touch | Overloaded circuit or loose wire | Pro |
| Breaker trips repeatedly | Overloaded or short circuit | Pro |
| Burning smell from outlet | Overheating, possible fire risk | Pro immediately |
For basic electrical repairs that go beyond a reset or visual check, comparing what each routine repair actually involves helps you decide whether to proceed or call in backup.
Troubleshooting advanced scenarios and avoiding fire risks
Once you move past dead outlets and tripped breakers, you enter territory that requires a bit more patience and some additional knowledge. Kansas City's humid summers create conditions where moisture gets into exterior outlets, crawlspaces, and basement wiring, making ground faults more frequent here than in drier climates.
Ground faults account for 98% of electrical faults, and many of them are moisture-related. The half-split or hopscotch method cuts diagnosis time significantly: start at the middle of a circuit, test, then move to the half that shows a fault, and repeat until you isolate the problem.
Advanced issues to watch for:
- Half-hot outlets: One slot works, one does not. This usually points to a switched outlet controlled by a wall switch you may not be aware of.
- Backstab connections: Older outlets and switches sometimes use push-in wiring instead of screw terminals. These fail over time and are a common hidden cause of intermittent power loss.
- Multi-room outages: When outlets in different rooms all die together, trace back to the GFCI or the breaker they share before assuming wiring damage.
Do not DIY these situations:
- Any work inside the breaker panel
- Homes with aluminum wiring (look for the label "AL" on wire insulation)
- Wiring you cannot trace or identify
- Repeated breaker trips with no obvious overload cause
- Any outlet or wire showing burn marks or a burning smell
Electrical fires account for around 51,000 fires annually, and many start from faults that a homeowner noticed but decided to ignore or fix incorrectly. The best prevention is a consistent maintenance habit.
Maintenance schedule to cut fire risk:
- Test all GFCI and AFCI outlets monthly using the test and reset buttons
- Have your panel inspected every 3 to 5 years by a licensed electrician
- Never use an extension cord as a permanent wiring solution
- Check outdoor and garage outlets after heavy rain or flooding
For Kansas City homeowners who want a broader look at protecting their property, KC electrical safety upgrades covers additional steps worth taking in 2026.
Why DIY electrical repairs are empowering—and where they shouldn't go
Most electrical guides either scare you away from everything or wave you through repairs that should only be handled by a licensed pro. Neither extreme serves you well. Our experience working with Kansas City homeowners is that the safest DIYer is not the most fearless one. It is the one who knows exactly where their knowledge ends.
Resetting a GFCI, replacing a cover plate, or swapping out a faulty outlet are genuinely empowering fixes. They save you money, build your confidence, and keep small problems from becoming expensive ones. But there is a firm ceiling, and it exists for good reason.
The CPSC data on electrical fires shows that professionals prevent tens of thousands of fires annually by catching defects that homeowners miss or misread. Some guides encourage people to swap switches and outlets without ever mentioning the risk of a miswired connection causing a slow-burn fire behind the wall. That omission is dangerous.
Our take: celebrate every safe fix you do yourself, and schedule a repair visit without hesitation when a problem goes beyond your comfort zone. Knowing your limit is not a weakness. It is the most protective thing you can do for your home and your family.
Expert support for electrical repairs in Kansas City
Sometimes a repair reaches the point where the right move is stepping back and calling someone who does this every day. That is not a failure. That is smart homeownership.

At MaddLadder, we work with Kansas City homeowners who want dependable, honest repair help without the guesswork. Whether you have hit a wall on a tricky outlet, need a fixture replaced, or want a pro to check something that does not look right, our team handles it efficiently and transparently. Our Kansas City electrical repairs cover the jobs that go beyond basic DIY, and our repair and replacement services are built around your schedule and budget. Visit MaddLadder to request a free estimate today.
Frequently asked questions
What's the safest way to tell if an outlet is live before repair?
Turn off the breaker for the affected circuit, then use a voltage tester with the live-dead-live method to confirm the outlet carries no current before you touch any wiring.
Can I replace an electrical outlet or switch myself?
Yes, replacing outlets and switches is safe when you cut power at the panel first, but never attempt wiring or panel work on your own since those jobs require a licensed electrician.
How often should I test my GFCI outlets in Kansas City?
Test them every month using the test and reset buttons on the outlet itself, since ground faults are especially common in Kansas City's humid climate and a failed GFCI offers no protection.
What's a sign I need a pro instead of DIY?
If you spot burned wires, notice a burning smell, or find yourself resetting the same breaker more than once, stop immediately and call a licensed electrician rather than continuing to troubleshoot on your own.