TL;DR:
- Wasted hours on rental furniture assembly cause costs, damage tenant relationships, and increase maintenance calls. Proper preparation, correct sequencing, and thorough safety checks ensure furniture is stable, durable, and rental-ready. Outsourcing professional assembly and performing post-setup inspections help prevent issues and maintain property standards.
Wasted hours on a rental turnover because a bed frame wobbles or a shelf collapses two weeks after move-in are not just frustrating. They cost you money, damage your reputation with tenants, and trigger maintenance calls that interrupt your schedule. Furniture assembly for rental properties is a different challenge than assembling something for your own home. The stakes are higher, the timeline is tighter, and the furniture needs to survive tenants who may not treat it gently. This guide walks you through everything from preparation to final safety checks so your next turnover runs like clockwork.
Table of Contents
- What you need before you start: Tools, parts, and rental-ready preparation
- Step-by-step furniture assembly for rentals: The efficient method
- Troubleshooting and common mistakes in rental furniture assembly
- Safety and quality checks: Ensuring stability before move-in
- What most landlords miss about furniture assembly for rentals
- Need expert rental furniture assembly or repair in Kansas City?
- Frequently asked questions
Key Takeaways
| Point | Details |
|---|---|
| Prepare properly | Gather all tools and organize hardware before you begin to save time and prevent mistakes. |
| Stage in final room | Always assemble furniture in the room where it will be used to avoid damage and make the process more efficient. |
| Follow step order | Loosely assemble, align, and then fully tighten fasteners for safe and stable results. |
| Check for stability | Inspect, stress test, and adjust each piece to ensure it's ready for tenant use before move-in. |
| Document assembly | Take photos or notes for future reference and easier troubleshooting during turnovers. |
What you need before you start: Tools, parts, and rental-ready preparation
With your goals in mind, the right preparation makes the rest of the process run smoother. Most assembly delays happen before a single bolt is tightened, because someone showed up without the right tools or opened five boxes at once without sorting anything.
Start with a tool checklist. Every rental assembly job needs:
- A Phillips and flathead screwdriver set
- A rubber mallet for fitting pieces without scratching surfaces
- Allen wrenches in multiple sizes (metric and standard)
- A power drill with screw bits
- A level for shelving and table surfaces
- A tape measure
- A flashlight or headlamp for dark corners
Sorting hardware before you begin is one of the most overlooked steps. Open the hardware bag, lay everything out, and match each piece to the instruction sheet. Missing a fastener before you start beats discovering the problem when you're halfway through.
Choosing the right furniture for rentals matters just as much as assembling it correctly. Rental properties see higher wear and tear than owner-occupied homes, so look for furniture with solid wood or metal frames rather than particleboard wherever your budget allows. Laminate and sealed surfaces clean up faster between tenants. Avoid upholstered pieces in high-traffic areas unless the fabric is stain-resistant and easy to wipe down.
| Furniture type | Key selection criteria for rentals | Assembly complexity |
|---|---|---|
| Bed frame | Metal or solid wood, minimal fabric | Medium |
| Dresser | Dovetail drawer joints, smooth glides | Medium |
| Dining table | Sealed surface, sturdy leg brackets | Low to medium |
| Bookshelf | Wall-anchor capable, solid back panel | Low |
| Desk | Cable-management holes, solid top | Low to medium |
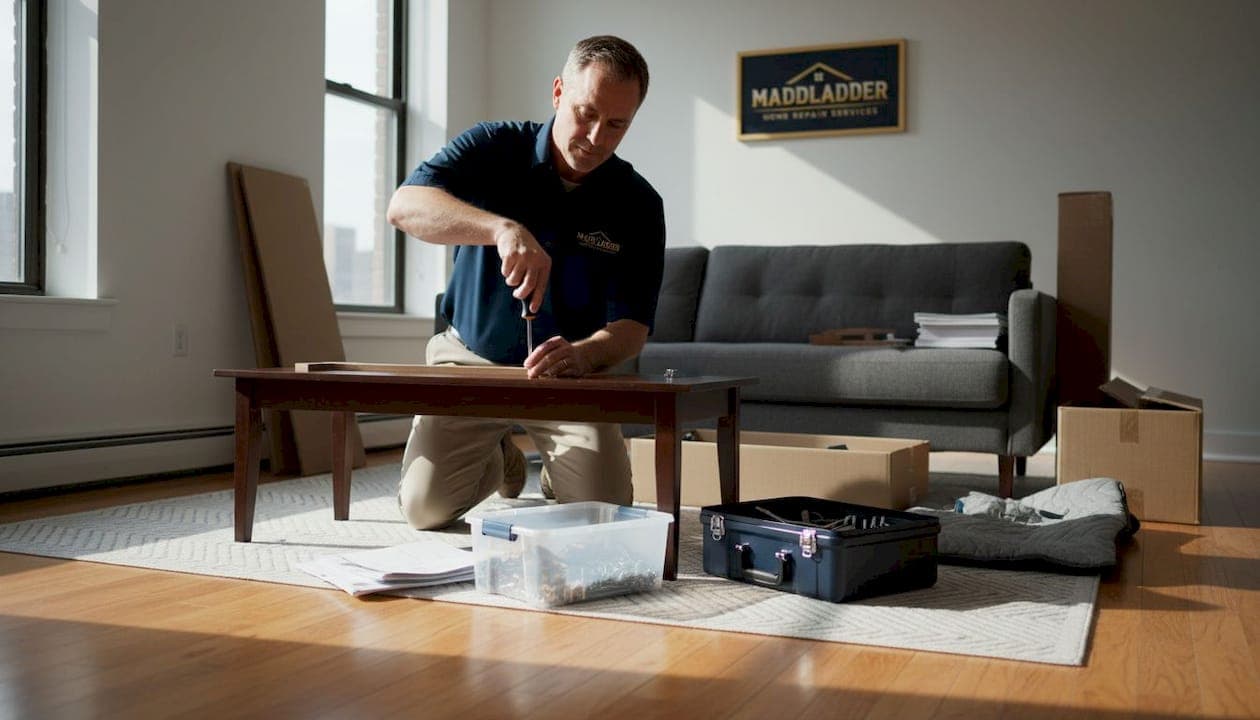
Stage furniture in the room before unpacking. Dragging a half-built bed frame down a hallway risks gouging walls and floors. Move boxes and flat-pack panels into the destination room first. This prevents damage to the property and reduces the number of times you have to handle heavy components.
Pro Tip: Keep a labeled bin of extra hardware in your maintenance vehicle. Rental furniture regularly arrives with missing bolts or stripped screws, and a quick replacement from your own stock saves a return trip to the hardware store.
Good furniture assembly tips consistently reinforce that alignment before tightening, correct sequencing, and stability checks are what separate rental-ready assembly from a job that fails in week one.
Step-by-step furniture assembly for rentals: The efficient method
Preparation complete, now follow this battle-tested step sequence for assembly success in rental units. The biggest mistake most people make is tightening everything down before checking that all parts are correctly positioned. Once a bolt is stripped or a dowel is seated incorrectly, you're working backward.
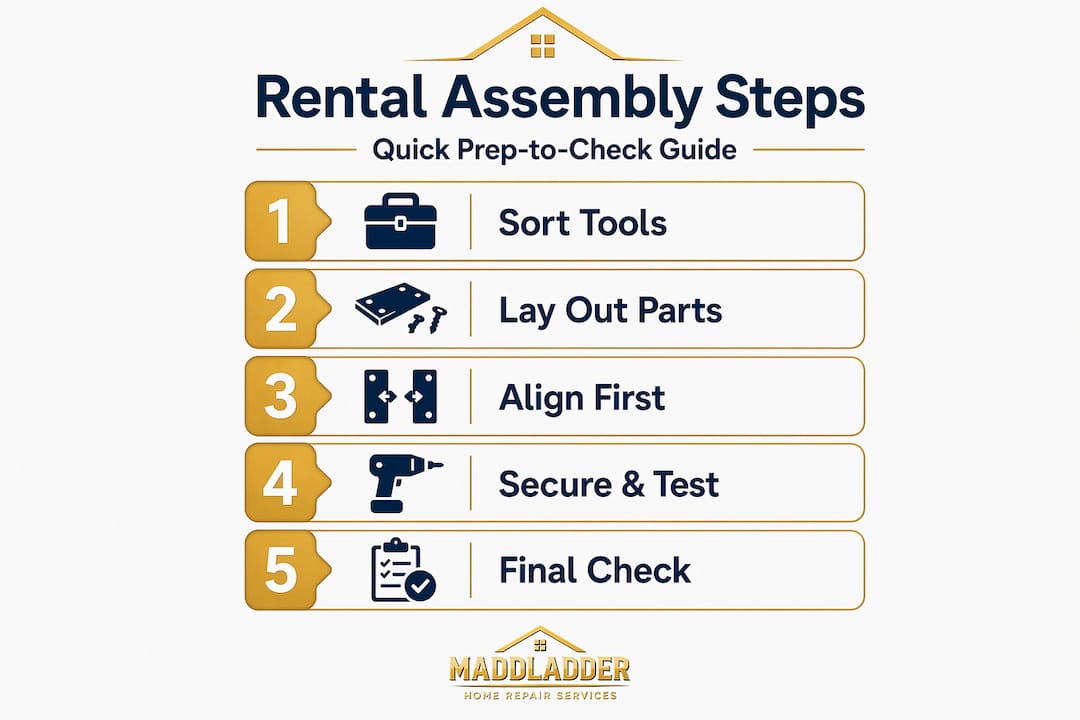
The efficient assembly sequence:
- Read the full instruction sheet before touching anything. Skimming instructions leads to backtracking. Identify any steps that require a second person before you begin.
- Lay out all components on the floor in the destination room. Group panels, hardware, and accessories separately.
- Sort and count all hardware. Verify you have the correct quantities before assembly starts.
- Begin with the largest structural pieces. For a bed frame, this means connecting the side rails to the headboard and footboard loosely. For a bookshelf, connect the side panels first.
- Loosely connect all joints before tightening anything. This is the single most important step for achieving alignment.
- Square the frame or structure. Measure diagonally from corner to corner. When both diagonal measurements match, the piece is square.
- Check for level on any surface that will hold weight. A dining table or desk that rocks damages tenant relationships quickly.
- Final tighten all fasteners once everything is aligned, squared, and sitting flat on the floor.
- Install secondary supports, slats, or backing panels per manufacturer guidance.
- Test with weight before leaving the room.
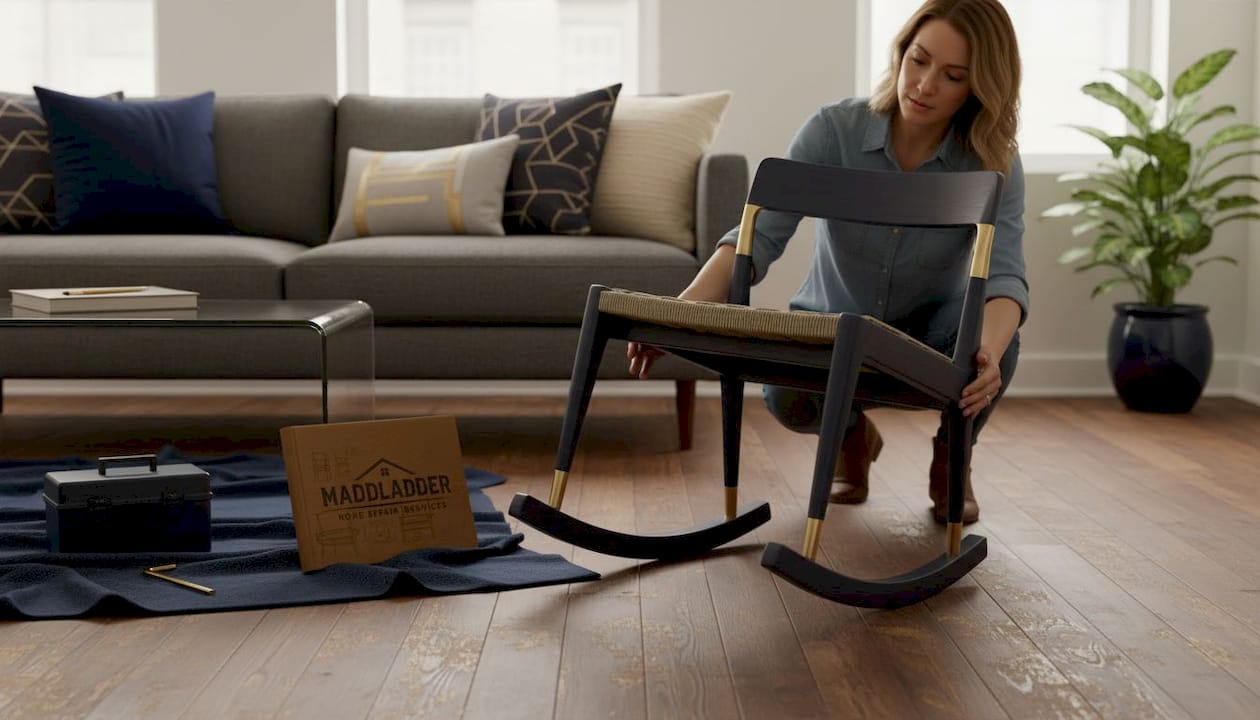
For beds specifically, a robust assembly approach means laying out all components in the destination room first, assembling loosely, squaring the frame before final tightening, and then installing slats and supports as directed. Skipping the squaring step is the number-one reason bed frames creak and weaken prematurely.
| Furniture item | Critical alignment step | Common failure point |
|---|---|---|
| Bed frame | Square diagonally before tightening | Rails pulling loose at bracket joints |
| Shelving unit | Level and wall-anchor after squaring | Tipping or bowing under book weight |
| Dining table | Level surface before locking leg brackets | Wobble from uneven leg height |
| Dresser | Check drawer slides before final tighten | Drawers sticking or falling off track |
Learning to assemble furniture efficiently is a real skill for property managers, especially when you're turning over multiple units in the same week. Cutting corners on step 5 or 6 almost always creates a service call within the first 30 days of tenancy.
Pro Tip: Use furniture assembly service tips from experienced professionals as a reference when tackling unfamiliar furniture brands. Different manufacturers use different hardware systems, and knowing common quirks saves real time on the job.
Troubleshooting and common mistakes in rental furniture assembly
Inevitably, issues arise. Here's how to spot and fix the mistakes before tenants do.
The most common mistakes in rental furniture assembly include:
- Overtightening fasteners before confirming alignment, which strips holes and creates permanent instability
- Missing a fastener entirely because hardware wasn't sorted before assembly started
- Skipping center support legs on beds and dining tables, leading to sag and breakage under normal use
- Failing to install wall anchors on tall shelving, which is both a safety hazard and a liability issue
- Using the wrong size Allen wrench and stripping bolt heads before they're fully seated
Wobbly furniture after assembly usually points to one of three problems. Either the frame was never squared, fasteners were tightened unevenly, or a support component was skipped. Fix a wobbly piece by loosening all fasteners back to finger-tight, re-squaring, and re-tightening in a consistent pattern, usually starting from the center and working outward.
Squeaky furniture is a different problem. Squeaks almost always come from two surfaces rubbing against each other under load. Common fixes include adding a thin furniture pad between metal rail brackets and wooden side panels, applying a small amount of wood glue to loose dowel joints, or replacing worn-out plastic glides on chair and table legs.
Kansas City property management teams that work through multiple turnovers each month often keep a small repair kit on site that includes replacement dowels, extra bolts in common sizes, and self-adhesive felt pads. These small items solve 80% of the squeaky and wobbly issues that come up during assembly checks.
Safety warning: Heavy furniture like bookshelves, armoires, and tall dressers that are not anchored to a wall pose a serious tipping risk. In rental properties with high turnover rates, these items see more movement and stress than in owner-occupied homes. Never leave a unit without anchoring tall furniture to a wall stud. This is not optional.
Beds benefit from being staged and squared in the destination room before final tightening. That single practice eliminates most of the callbacks related to bed frames in the first few weeks of tenancy.
Review essential assembly tips before any large-scale turnover. Having a reference list reduces the chance of a costly oversight in a unit you're rushing to flip.
Safety and quality checks: Ensuring stability before move-in
With everything assembled, thorough safety and quality checks protect both you and your tenants. A unit that looks ready is not the same as a unit that is ready.
Pre-move-in safety and stability checklist:
- Apply firm downward pressure on every horizontal surface (bed platform, shelf, table top) to test for flex or give
- Grab the sides of each piece and apply lateral force to check for racking or wobble
- Open and close all drawers and doors to confirm smooth operation
- Sit on chairs and the bed to simulate real use
- Inspect every visible bolt and fastener connection for tightness
- Confirm wall anchors are installed and seated in studs, not just drywall
- Check all four corners of large pieces for even contact with the floor
- Listen for creaking or popping during the weight test
Critical connections to double-check for specific furniture types:
- Beds: Rail-to-frame brackets, center support leg contact with floor, slat spacing, and headboard attachment
- Shelving: Top anchor to wall, back panel staples or screws, and shelf pin seating
- Tables: All four leg bracket bolts, apron connections, and surface fasteners
Stability callout: Furniture that passes a visual inspection can still fail a weight test. A bed frame that creaks when you push it by hand will likely fail under a sleeping tenant within weeks. Never skip the sit-down and lateral push tests. Thirty seconds of testing saves hours of callbacks.
Furniture assembly quality for rentals depends on alignment before tightening, correct sequencing, and stability checks. Those three principles, applied to every piece in every unit, create a property that tenants trust and that you can defend at move-out.
Document your work. Take a photo of each assembled piece with a timestamp before leaving the unit. This protects you if a tenant later claims damage was pre-existing or that furniture was defective at move-in. It also helps you track which furniture brands hold up well across multiple turnovers.
Consider pairing furniture quality with property safety upgrades to give your tenants a fully safe living environment. Checking professional repairs for safety alongside your assembly work keeps the entire unit at a high standard. And when it's time to refresh a unit, knowing when to replace fixtures for safety keeps your property competitive and compliant.
What most landlords miss about furniture assembly for rentals
Here's the honest reality that standard assembly guides never mention: the instructions that come with furniture are written for homeowners who assemble something once and never move it. They are not written for rental properties where a piece might be disassembled, moved between units, and reassembled twice in a year.
That repeated handling changes everything. Dowel joints loosen with each disassembly. Bolt holes widen when fasteners are overtightened during a rushed turnover. Cam locks wear down after repeated use. A piece that was solid at first assembly can be genuinely unsafe by the third tenant if no one has rechecked the fasteners between occupancies.
The habit most experienced property managers develop is a post-first-use recheck. After a new tenant has been in the unit for 30 days, any initial settling in the furniture becomes visible. Fasteners that were properly torqued sometimes back out slightly as wood compresses around them. Support legs that were making solid floor contact may have shifted. A 15-minute walkthrough at the 30-day mark catches these issues before they become tenant complaints or injury risks.
Standard assembly guides also never address the fact that tenants interact with furniture differently than homeowners. A bed that sees one or two users nightly in a stable family home faces different stress than a bed in a short-term rental that might see guests of varying weights on consecutive nights. Build for that reality, not the ideal scenario.
Relying only on visual checks is not enough. Every piece needs to be physically tested. Push it, pull it, sit on it, and load weight on shelves before you consider a unit ready. A checklist that requires hands-on testing forces you to actually stress the furniture rather than just glance at it.
Pro Tip: Make a simple inspection form that lists every piece of furniture in the unit with a checkbox for each stability and safety test. Run through it at every turnover and keep copies in your property file. This creates accountability and speeds up the process because you never have to think about what to check.
Knowing when to save time on assembly by calling in a professional is part of this wisdom too. On a tight turnover timeline with four or five units to flip in a week, outsourcing assembly to someone who does this every day often makes more financial sense than burning your own hours on flat-pack furniture.
Need expert rental furniture assembly or repair in Kansas City?
If you're managing multiple properties in the Kansas City metro, you already know that time is your most valuable resource during a turnover. Assembling furniture correctly takes longer than most people expect, and doing it wrong costs even more.

MaddLadder offers professional furniture assembly and installation services designed specifically for the pace and demands of rental turnovers. Whether you need beds, shelving, tables, or full unit setups assembled and safety-checked before move-in, the team handles it efficiently and reliably. Need something repaired or replaced between tenants? The furniture repair and replacement service gets wobbly, damaged, or worn-out pieces back to tenant-ready condition fast. Explore all available property services to find the right fit for your maintenance needs, and get a free estimate before you commit.
Frequently asked questions
What tools are essential for assembling furniture in rentals?
You need a screwdriver set, hammer, Allen wrenches, and a power drill for most rental furniture jobs. A level and tape measure are also essential for shelving and tables.
How can I prevent tenants from damaging assembled furniture?
Select sturdy furniture, tighten all fasteners, and check for stability at every turnover to reduce damage risk. Assembly quality depends on alignment before tightening, correct sequencing, and stability checks at every turnover cycle.
Is it faster to assemble furniture with two people?
Yes, having a second person speeds up the process significantly and is nearly required for heavy items like bed frames and large shelving units. Many steps in the squaring and alignment process are also more accurate with two sets of hands.
What are the top mistakes to avoid during assembly?
Avoid overtightening before checking alignment, missing hardware, and skipping support installation. Beds especially benefit from being staged and squared in the destination room before final tightening.
How do I know if assembled furniture is truly rental-ready?
Walk through a stability check, visually inspect all joints, and test for movement or creaks before tenant move-in. Furniture assembly quality depends on alignment before tightening, correct sequencing, and stability checks that go beyond a visual inspection.