TL;DR:
- Regular trim replacement prevents moisture damage, pest entry, and energy loss, safeguarding your home’s structure. Proper installation, quality materials, and scheduled inspections extend trim lifespan, reducing costly repairs. Replacing interior trim during remodels enhances visual cohesion and overall home value, emphasizing maintenance's importance.
Trim is your home's first line of defense against moisture, pests, and energy loss. Understanding why regular trim replacement matters keeps small problems from turning into expensive structural repairs. Exterior trim, including fascia boards, window casings, and door surrounds, seals the building envelope. Interior trim ties together flooring, walls, and doors into a finished, cohesive look. When either type deteriorates, the consequences reach far beyond cosmetics. This article covers the risks of neglect, the role of materials and installation, the best timing for interior replacement, and a practical schedule for keeping your trim in top shape.
Why regular trim replacement matters: the real risks of neglect
Damaged or deteriorated trim creates problems that compound quickly. Exterior wood trim protects your home's framing and insulation from moisture and pests. When that protection fails, the damage spreads inward, often invisibly, until repair costs multiply.
Moisture, rot, and hidden structural damage
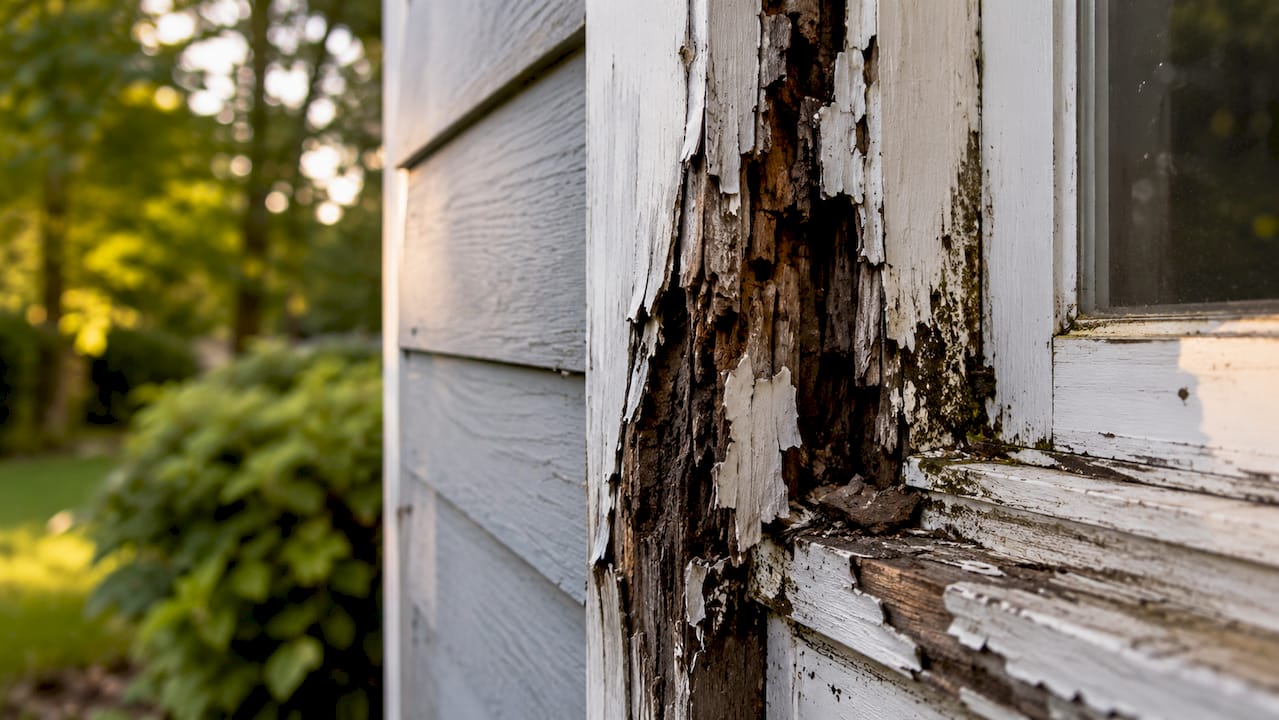
Water is the most destructive force acting on your home's exterior. Cracked or peeling trim lets moisture seep behind siding and into wall cavities. Once moisture reaches wood framing, rot sets in fast. Mold follows, degrading insulation and air quality. Trim pulling away from rooflines usually signals rot in the underlying sheathing or framing, not just a surface problem. By the time you see visible damage, the hidden damage is often already extensive.
Pest entry and energy loss
Gaps in deteriorated trim are open invitations for carpenter ants, termites, and rodents. These pests exploit even small cracks to nest inside wall cavities. Beyond pests, gaps in exterior trim break the thermal seal of your home. Heated or cooled air escapes, and outdoor air infiltrates, driving up your utility bills every month the problem goes unaddressed.
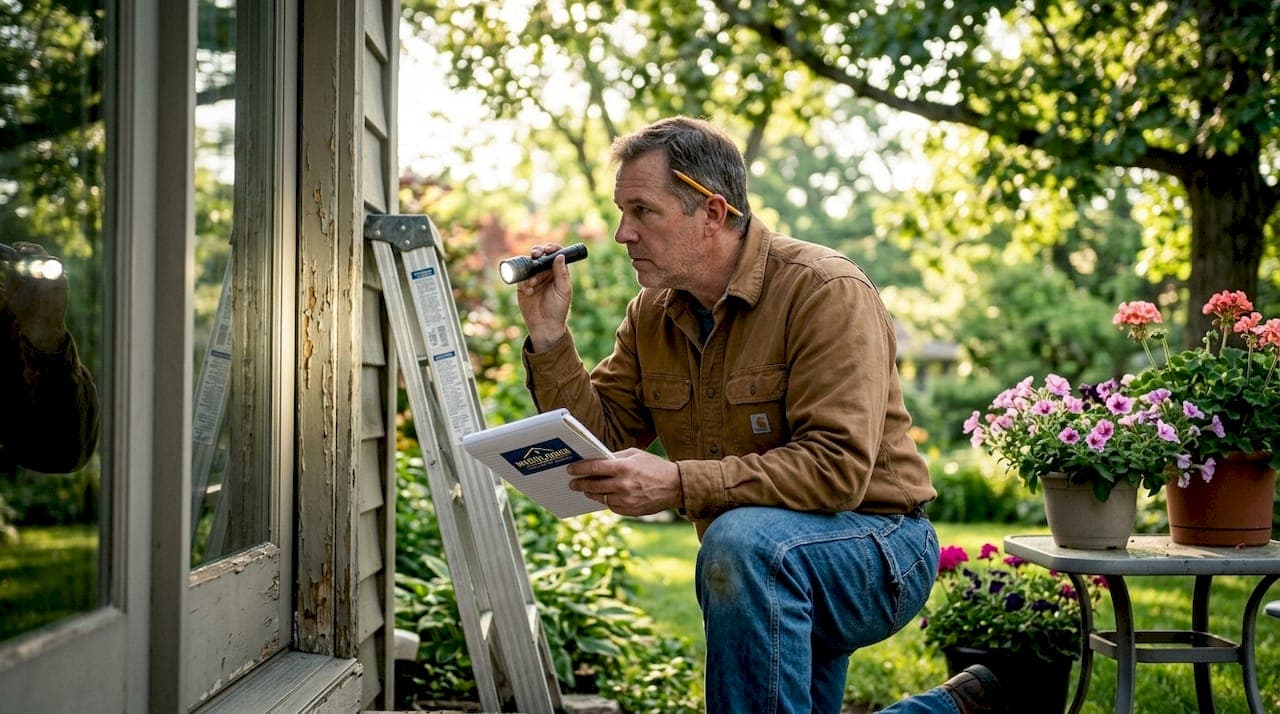
The warning signs you cannot ignore
Catching trim problems early saves money. Watch for these specific indicators:
- Soft spots on fascia boards or window casings when you press them
- Peeling or bubbling paint that signals moisture trapped beneath the surface
- Visible gaps between trim and siding, windows, or door frames
- Pest entry points such as small holes or sawdust near trim joints
- Trim pulling away from the structure at any point along its length
Signs like soft fascia spots and visible gaps require immediate action. Widespread damage across multiple sections means replacement, not repair.
How material choice and installation affect trim longevity
The quality of your trim installation determines how long it lasts. Even the best materials fail early when installation shortcuts are taken.
Why installation quality comes first
Sealing all cut ends and joints during installation is the single most important step for preventing premature wood failure. End grain absorbs moisture faster than any other part of a board. Skipping this step, even with quality lumber, leads to rot within a few years. Proper installation also requires moisture barriers behind trim boards and correct flashing at horizontal joints. Proper installation with sealed cut ends can extend trim lifespan well beyond 10 years. That is a significant return on a relatively small amount of additional labor at installation time.
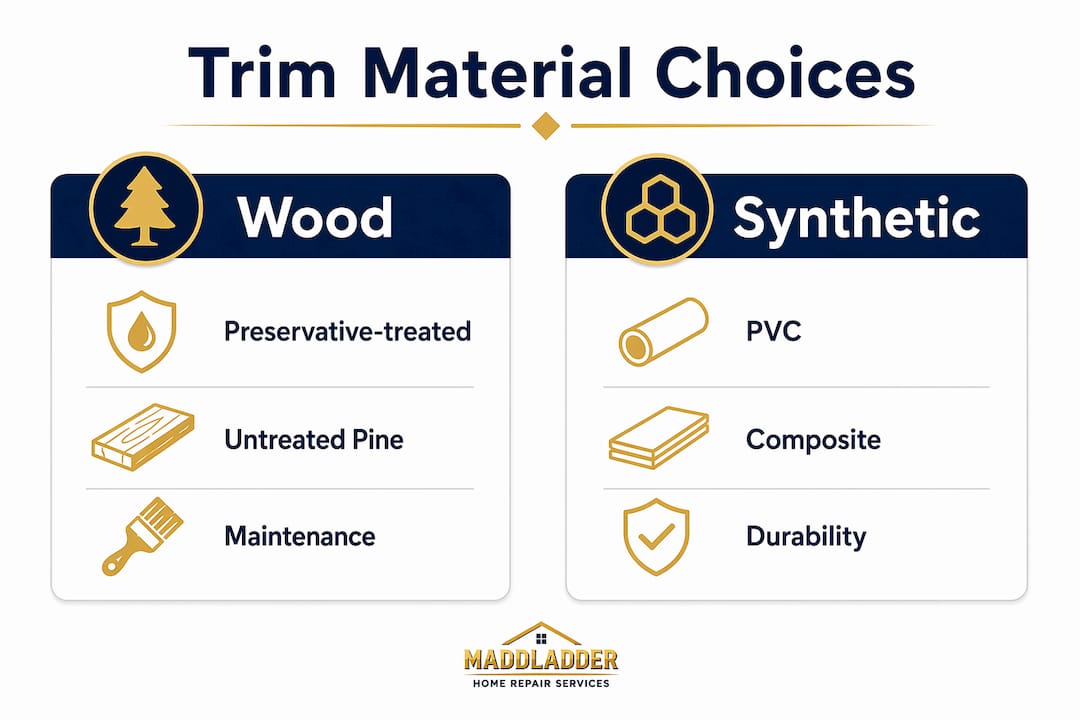
Choosing the right trim material
Material selection shapes your long-term maintenance schedule. The table below compares the most common exterior trim materials by durability, maintenance demand, and cost profile.
| Material | Durability | Maintenance Level | Best For |
|---|---|---|---|
| Preservative-treated wood | High | Moderate | Budget-conscious installs with proper sealing |
| PVC (cellular foam) | Very high | Low | High-moisture areas, minimal repainting |
| Fiber cement | Very high | Low to moderate | All climates, paint-hold longevity |
| Standard pine | Moderate | High | Interior trim, protected exterior locations |
| Composite wood | High | Low to moderate | Varied climates, rot resistance |
Preservative-treated wood and synthetic trim resist decay and insect damage better than untreated pine. They also hold paint longer, which directly reduces how often you need to repaint. PVC and fiber cement products are particularly strong choices in the Kansas City area, where freeze-thaw cycles and summer humidity both stress exterior materials.
Pro Tip: Prime and paint all six sides of wood trim boards before installation, not just the face. This single step dramatically reduces moisture absorption at edges and backs, where most rot starts.
When should you replace interior trim during a remodel?
Interior trim replacement is most cost-effective when timed with other renovation work. Treating it as an afterthought creates extra labor and risks damaging your new floors or walls.
The case for coordinated replacement
Replacing interior trim during remodels is more cost-effective and visually cohesive than postponing it. When you change flooring, the existing base molding often needs to come off anyway. Installing new trim at that stage costs less than returning later to remove finished flooring, scribe new trim to fit, and risk scratching or gouging the surface. Retrofitting trim after floors are finished requires precision scribing and risks damaging finished surfaces.
Interior trim issues that demand replacement
Not every interior trim problem is a cosmetic preference. Some situations require replacement regardless of remodel timing:
- Gaps at floor or ceiling lines that have opened due to settling or humidity changes
- Mismatched styles from previous renovations that break visual consistency room to room
- Cracked or split molding from impact damage or wood movement
- Water stains or swelling near windows or exterior walls indicating past moisture intrusion
- Outdated profiles that clash with new doors, windows, or cabinetry
Interior trim choices strongly influence the perceived quality and cohesion of remodels. Under-investing in trim can diminish the visual impact of more expensive upgrades like hardwood floors or custom cabinetry.
The practical rule is straightforward. If you are already pulling trim off to install new flooring or doors, replace it rather than reinstall the old pieces. The incremental material cost is small compared to the labor savings and the finished result.
How often should you inspect and replace trim?
Trim replacement frequency depends on your climate, material type, and how well you maintain the finish coat. A consistent inspection and maintenance schedule is the most reliable way to extend lifespan and catch problems before they escalate.
The recommended inspection schedule
Follow this numbered sequence for a complete trim maintenance program:
- Inspect all exterior trim twice per year. Spring and fall are the best times. Spring reveals winter damage; fall catches summer UV and moisture wear before cold weather sets in.
- Inspect after every major storm. High winds, hail, and heavy rain can crack caulk joints and dislodge trim boards. Biannual exterior inspections and post-storm checks are the industry standard for preventing moisture-related rot and pest damage.
- Check paint and caulk condition annually. Repaint before coating failure to preserve both appearance and structural integrity. Sunlight and weather wear coatings from the outside in; waiting until paint peels means moisture has already reached the wood.
- Probe soft spots with a screwdriver. If the tip sinks into the wood with light pressure, the board needs replacement, not just repainting.
- Recaulk all joints every 3–5 years. Caulk shrinks and cracks over time. Fresh caulk at trim joints and around windows is cheap insurance against water intrusion.
Repair vs. replacement: making the right call
Minor surface cracks and small areas of peeling paint are repair territory. Early replacement of damaged trim is more cost-effective than repeated repairs when damage affects large sections. The tipping point is usually when more than one-third of a board shows soft spots, rot, or separation from the structure. At that point, patching costs nearly as much as replacement and the underlying problem is likely to return.
Connecting preventive home maintenance habits to your trim care routine pays off. Homeowners who inspect and maintain trim on a schedule spend significantly less on emergency repairs than those who address problems only when they become visible and severe.
Pro Tip: During storm season in the Kansas City area, walk your home's perimeter within 48 hours of any significant weather event. Look specifically at fascia boards, window casings, and trim at roof transitions. These areas take the most abuse and show damage first.
Key takeaways
Treating trim as a structural system rather than a finish detail is the single most effective way to protect your home's value and avoid expensive hidden damage.
| Point | Details |
|---|---|
| Trim protects the building envelope | Damaged trim allows moisture, pests, and air infiltration that cause hidden structural damage. |
| Installation quality determines lifespan | Sealing cut ends and applying moisture barriers extends trim life well beyond 10 years. |
| Material choice shapes maintenance frequency | PVC and fiber cement require less upkeep than untreated pine in high-moisture climates. |
| Interior replacement timing saves money | Replacing trim during flooring or door installs cuts labor costs and protects finished surfaces. |
| Biannual inspections catch problems early | Inspecting twice yearly and after storms prevents minor wear from becoming major repairs. |
Trim is your home's unsung structural layer
I have seen homeowners spend $15,000 on a kitchen remodel and then balk at replacing $400 worth of window trim that was visibly rotting. That is the most common and most expensive mistake in home maintenance. Trim looks like decoration. It is not. It is the seal between your home's interior and everything the weather throws at it.
What I have learned from years of watching homes age is that the ones that hold their value longest are maintained from the outside in. The owners treat trim the way they treat their roof: as a system that needs scheduled attention, not emergency reaction. They repaint before the paint fails. They recaulk before the joints open. They replace a single rotted fascia board before it takes out the soffit behind it.
The other thing most articles skip is the interior side of this equation. Trim inside your home is not just decorative. It signals quality to every buyer, appraiser, and guest who walks through your door. Mismatched profiles, cracked molding, and gaps at the floor line tell a story about deferred maintenance. That story costs you money when you sell. Replacing interior trim during a remodel is not an upgrade. It is the minimum standard for a finished result.
My honest recommendation: add trim to your biannual home inspection checklist alongside gutters and HVAC filters. Walk the perimeter. Press the wood. Check the paint. Fix what you find. The cost of attention is always lower than the cost of neglect.
— Jennifer
Let Maddladder handle your trim replacement in kansas city
Trim replacement is straightforward when you catch problems early and have the right tools. When damage is widespread or you are mid-remodel and need everything done right the first time, professional installation makes the difference between a lasting result and a callback.

Maddladder serves homeowners, landlords, and property managers across the Kansas City metro area with dependable trim and fixture replacement services. The team handles exterior fascia, window casings, door surrounds, and interior molding, with proper sealing and finishing included. Free estimates are available, and one-time service starts at $75/hour. If you want trim done correctly without the guesswork, contact Maddladder to schedule your inspection or get a quote today.
FAQ
What are the first signs you need a trim replacement?
Soft spots when you press the wood, peeling paint, visible gaps at joints, and trim pulling away from the structure are the clearest indicators. Any of these signs warrant immediate inspection to determine whether repair or full replacement is needed.
How often should exterior trim be replaced?
Exterior trim lifespan depends on material and maintenance, but most wood trim requires replacement every 10–20 years with proper upkeep. PVC and fiber cement products last longer with minimal maintenance compared to untreated pine.
Does replacing interior trim add home value?
Yes. Interior trim directly influences the perceived quality of a remodel and the finished appearance of any room. Mismatched or damaged trim reduces the visual impact of more expensive upgrades like new flooring or cabinetry.
Is it better to repair or replace damaged trim?
Repair works for isolated surface cracks or small peeling areas. Replacement is the better choice when damage covers a large section, when soft rot is present, or when the trim is pulling away from the structure, which often signals hidden rot beneath.
What is the most important step during trim installation?
Sealing all cut ends and joints with a moisture-resistant sealant is the most critical installation step. This practice prevents moisture from entering end grain, which is the most common cause of premature wood failure in exterior trim.