
A well-maintained garage door needs three monthly safety checks, two seasonal lubrication sessions, and one annual tune-up. That's the whole system. Here's what each level looks like in practice:
Monthly (5 minutes):
- Run the auto-reverse test: place a 2×4 flat on the ground in the door's path and close the door. It should reverse within two seconds of contact. If it doesn't, stop using the opener immediately.
- Test the photo-eye sensors: wave a broomstick through the beam while the door is closing. No reversal means dirty or misaligned sensors.
- Visual scan: look for frayed cables, loose hinges, or cracked rollers. The U.S. Consumer Product Safety Commission and UL 325 safety standards both require functional auto-reverse on all residential openers.
Seasonal (spring and fall, 20–30 minutes):
- Lubricate springs, rollers, hinges, and the opener drive.
- Inspect weatherstripping and bottom seal.
- Clean the exterior once a year with mild detergent; never use a pressure washer, which forces water into seals.
Annual:
- Balance test: unplug the opener, pull the red release cord, and lift the door manually to about halfway (3–4 feet). A balanced door holds that position on its own. If it drops or rises, call a technician — do not adjust the springs yourself.
Pro Tip: Set a phone reminder for the first Saturday of each month. Five minutes now prevents a $300 emergency call later.
Key Takeaways
Consistent monthly checks, twice-yearly lubrication with silicone spray or white lithium grease, and one annual professional tune-up are the three habits that keep a residential garage door safe and reliable for years.
| Point | Details |
|---|---|
| Monthly safety checks | Run the auto-reverse and photo-eye tests every month; five minutes prevents costly failures. |
| Seasonal lubrication | Apply silicone spray to hinges and rollers, white lithium grease to the opener drive, each spring and fall. |
| Skip WD-40 | WD-40 strips existing lubrication and attracts grit; use silicone spray or white lithium grease only. |
| Balance test rule | If the door doesn't hold at 3–4 feet when released, call a technician; never adjust springs yourself. |
| Maddladder for pro work | Licensed technicians in the Kansas City metro area handle springs, cables, and annual tune-ups safely. |
Table of Contents
- What tools and supplies do you need before you start?
- How to do a full garage door tune-up, step by step
- Which lubricants should you use, and which should you avoid?
- How do you test door balance and the auto-reverse feature?
- When should you do each maintenance task?
- What are the safety warnings and when should you call a pro?
- How do you choose the right replacement parts?
- How do you reset or calibrate a garage door opener?
- Weatherproofing your garage door beyond the bottom seal
- DIY maintenance is smart. Knowing its limits is smarter.
- Maddladder handles the repairs you shouldn't do yourself
- Sources
What tools and supplies do you need before you start?
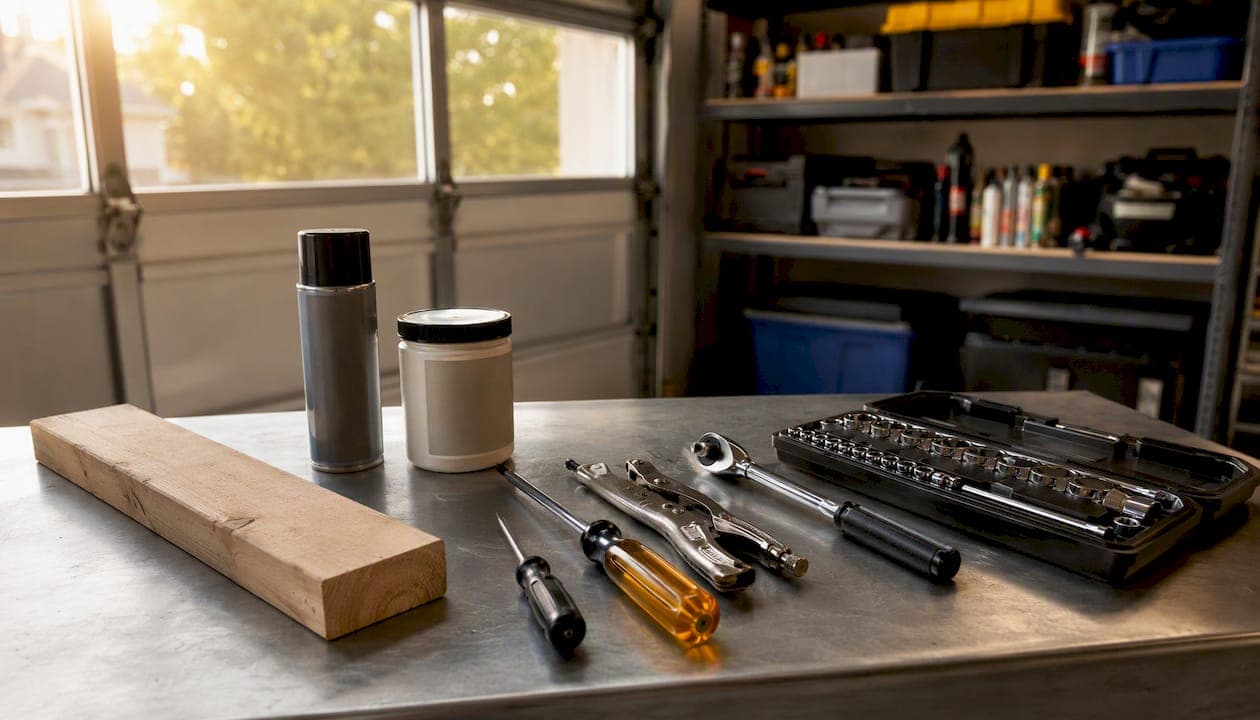
Gather everything before you begin. Stopping mid-task to find a wrench is how small jobs turn into long afternoons.
| Tool / Supply | Purpose |
|---|---|
| Silicone-based spray lubricant | Rollers, hinges, tracks, and sensor brackets |
| White lithium grease | Torsion spring coils, opener chain or screw drive |
| Socket and wrench set (3/8" drive) | Tightening lag screws, hinge bolts, and track brackets |
| Flathead and Phillips screwdrivers | Opener panel, sensor adjustments |
| Locking pliers or C-clamps | Securing the door open while you work underneath |
| 2×4 board (scrap piece) | Auto-reverse test |
| Safety glasses | Eye protection when lubricating overhead parts |
| Flashlight or headlamp | Inspecting tracks, cables, and bottom brackets |
| Mild dish soap and soft cloth | Exterior cleaning |
| Replacement weatherstripping / bottom seal | Swap out cracked or compressed seals |
| 9V battery | Keypad or wall button backup |
Silicone spray vs. white lithium grease: silicone spray works on most moving parts because it stays clean, repels moisture, and won't gum up nylon rollers. White lithium grease handles high-load metal-on-metal contact better, so use it on the opener chain or screw drive and on torsion spring coils. Never mix the two on the same component.
Pro Tip: Lay a drop cloth or old cardboard under the door before lubricating. Drips on a concrete floor become a slip hazard fast.
Safety note: unplug the opener at the outlet before working near the motor unit or drive system. Tell everyone in the house you're working on the door so no one triggers the wall button.
How to do a full garage door tune-up, step by step
According to Family Handyman, most tune-up steps take 10 minutes or less. The sequence below is designed so each step builds on the last.
Before you touch anything:
- Unplug the opener from the ceiling outlet.
- Clamp locking pliers onto the track just below the bottom roller on each side. This prevents the door from moving if it's in the open position while you work.
- Tell anyone in the house the door is offline.
The tune-up sequence:
- Visual inspection of panels and weatherseal. Look for dents, rust spots, or cracked panels. Check the bottom seal for compression or gaps. Run your hand along the side weatherstripping — if it crumbles or pulls away easily, replace it.
- Tighten accessible hardware. Use a socket wrench to snug up hinge bolts, roller brackets, and track mounting bolts. Do not touch the bottom brackets (the ones at floor level connected to the lift cables) — those are under cable tension and are a professional-only zone.
- Inspect rollers. Steel rollers with worn bearings wobble visibly. Nylon rollers with cracked wheels need replacement. Most homeowners can swap rollers on the middle and top brackets; leave the bottom bracket rollers to a technician.
- Check the tracks. Wipe the inside of both tracks with a damp rag to remove built-up grime. Look for bends or gaps between the track and the wall bracket. A slightly out-of-plumb track can often be tapped gently back into position with a rubber mallet, but a significantly bent or separated track needs a pro.
- Clean the sensor lenses. Wipe both photo-eye lenses with a dry cloth. A smudge is often the entire reason a door won't close.
- Lubricate moving parts. Spray silicone lubricant on hinges, roller stems (not the track itself), and the top of the torsion spring coils. Apply white lithium grease to the opener chain or screw drive per Chamberlain's maintenance guidance. Wipe away any excess — pooled lubricant collects dirt.
- Check the opener mounting. Confirm the opener bracket is firmly attached to the ceiling framing. A loose mount causes vibration noise and can stress the drive rail over time.
- Replace the bottom seal if needed. Slide the old seal out of its retainer channel and slide the new one in. This is one of the easiest swaps on the door.
Springs and lift cables are under extreme tension — enough to cause serious injury if they release suddenly. Never attempt to adjust, unwind, or replace a torsion spring yourself. The same applies to frayed cables and bottom brackets. These are professional-only repairs, full stop.
Lowe's 7-step maintenance process and Home Depot's maintenance guidance both confirm that tightening accessible hardware, lubricating moving parts, and testing the reversing mechanism are homeowner-safe tasks — spring and cable work are not.
Pro Tip: Before you wrap up, run the door through two full open-close cycles and listen. A grinding noise usually means a dry roller bearing. A popping sound often points to a hinge that needs lubrication. Document any unusual sounds with a voice memo and share it with a technician if you decide to call one.
Which lubricants should you use, and which should you avoid?
The single most common garage door maintenance mistake is reaching for WD-40. It's everywhere in the garage, it smells like it should work, and it absolutely should not be your go-to here. WD-40 is a solvent and water displacer, not a long-term lubricant. It strips existing grease off springs and bearings, then evaporates, leaving metal-on-metal contact and a residue that attracts grit.
Use these instead:
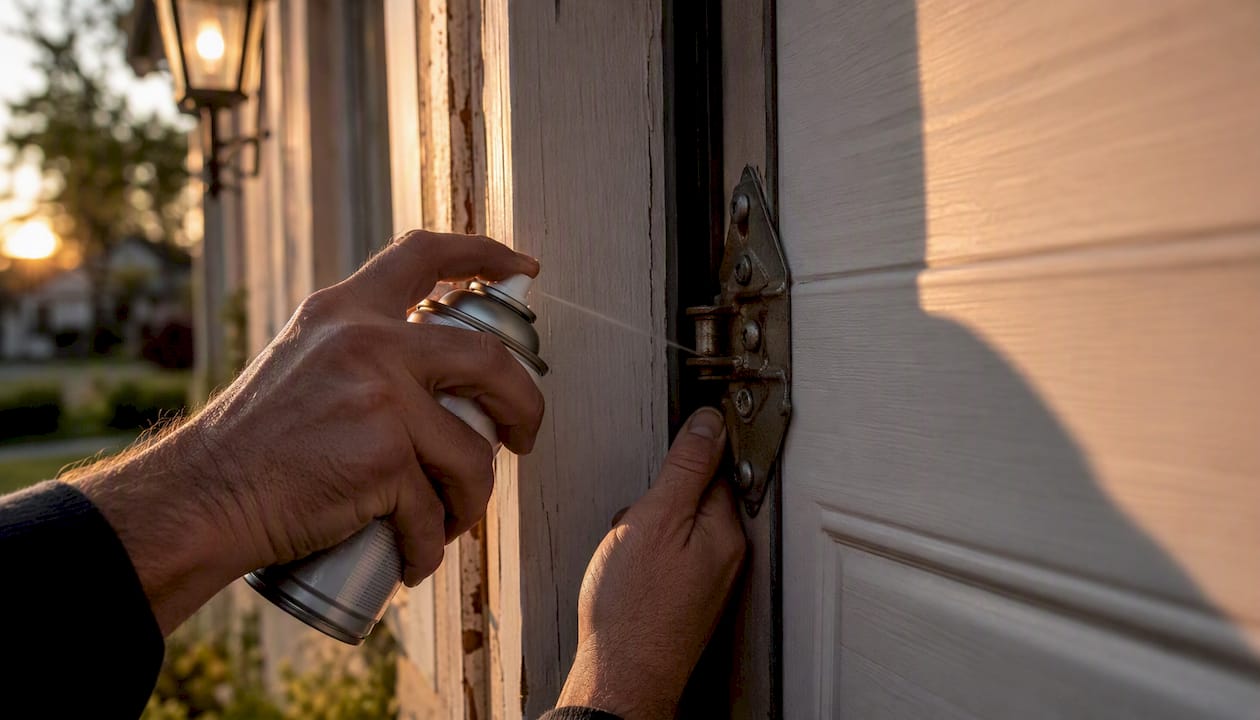
- Silicone-based spray: hinges, roller stems, nylon rollers, and the track's end curves (not the flat running surface). Silicone stays clean, doesn't attract dust, and won't degrade rubber or plastic components.
- White lithium grease: torsion spring coils, opener chain or screw drive, and metal roller bearings. It handles load and heat better than silicone.
Nylon rollers are the exception to the white lithium rule. Grease degrades nylon over time. Use silicone spray only on nylon rollers.
How to apply: a light, even coat is enough. Spray hinges at the pivot point and let the door cycle once so the lubricant works into the joint. Wipe any drips immediately. Over-lubrication is a real problem — excess grease on the track collects debris and can cause the door to slip.
Exterior cleaning: mild dish soap and a soft cloth, once a year. If your home is near a road that gets salted in winter, clean the door exterior two or three times a year. Road salt accelerates rust on steel panels and conceals early damage. Amarr's care guidance specifically warns against pressure washing, which drives water behind seals and into panel joints. For winter prep, the winterization tips from One Day Doors & Closets are worth a read before temperatures drop.
Quick answers on lubrication:
- How often? Twice a year: once in spring, once in fall.
- What about the tracks? Clean them, don't lubricate them. A lubricated track causes rollers to slip.
- Can I use motor oil? No. It attracts dirt and gums up in cold weather.
How do you test door balance and the auto-reverse feature?
These two tests are the most safety-critical checks in any garage door upkeep routine. Run them monthly.
Balance test
- Close the door fully.
- Unplug the opener from the ceiling outlet.
- Pull the red emergency release cord to disconnect the door from the drive carriage.
- Lift the door manually to about 3–4 feet off the ground.
- Let go.
A properly balanced door holds that position. It should neither rise nor fall more than a few inches. Per IDA's care and maintenance guidance, a door that falls or rises needs a professional technician — the spring tension is off, and adjusting it yourself is dangerous.
Auto-reverse test
- Place a 2×4 flat on the ground, centered in the door's path.
- Close the door using the opener.
- When the door contacts the board, it should reverse within two seconds.
If it doesn't reverse, stop using the opener until a technician adjusts the force settings. The Garage Guide's annual checklist recommends running this test monthly, not just annually.
Photo-eye test
- Start closing the door with the opener.
- Wave a broomstick through the sensor beam (the invisible line between the two small sensors near the floor on each side).
- The door should immediately reverse.
If it doesn't, wipe both sensor lenses with a dry cloth and retest. If it still fails, check that both sensors are aligned (the indicator lights on most units will be solid, not blinking, when aligned). A sensor that still fails after cleaning and realignment needs professional attention.
Safety timeline: if the auto-reverse fails, stop using the opener immediately. Sensor cleaning and realignment are DIY-safe. Force adjustment and spring or cable work are not.
When should you do each maintenance task?
An organized schedule is what separates a door that lasts 15–20 years from one that needs a $500 emergency repair at the worst possible time. Overhead Door Company of Puget Sound's maintenance schedule confirms that many emergency calls are preventable with basic upkeep on a consistent cadence.
| Task | Cadence | Pass / Fail Criteria |
|---|---|---|
| Auto-reverse test | Monthly | Reverses within 2 seconds on 2×4 contact |
| Photo-eye test | Monthly | Door reverses when beam is broken |
| Visual inspection (cables, hardware) | Monthly | No fraying, no loose bolts, no cracks |
| Bottom seal check | Monthly | No visible gaps at floor level |
| Lubricate hinges, rollers, springs | Twice yearly (spring and fall) | Light coat applied, no pooling |
| Lubricate opener chain / screw drive | Twice yearly | White lithium grease, per manufacturer |
| Tighten accessible hardware | Twice yearly | Snug, not overtightened |
| Inspect weatherstripping | Twice yearly | No cracks, tears, or compression gaps |
| Exterior wash | Annually (more near salt roads) | Clean surface, no rust spots |
| Balance test | Annually (or if door feels heavy) | Door holds at 3–4 feet when released |
| Professional tune-up | Annually | Springs, cables, track alignment assessed |
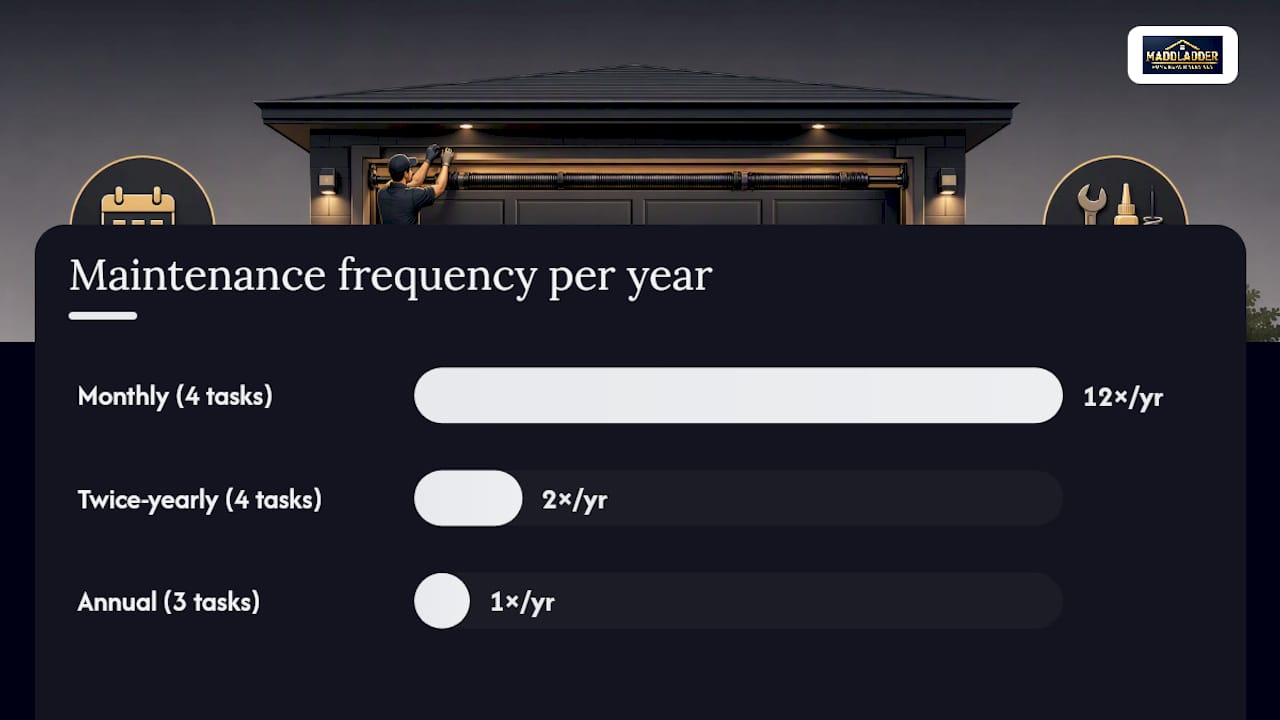
Monthly quick checks take about five minutes. The seasonal sessions run 20–30 minutes. The annual professional visit covers what you can't safely do yourself: spring tension, cable condition, track alignment, and a written assessment.
Pairing your garage door schedule with a broader seasonal home maintenance plan makes it easier to stay consistent — you're already outside checking gutters and HVAC filters, so add the door to the same Saturday.
What are the safety warnings and when should you call a pro?
Most garage door tasks are genuinely DIY-friendly. A handful are not, and the line between the two is tension. If a component is under spring or cable tension, it belongs to a licensed technician.
Stop and call a pro if you see any of these:
- Frayed or kinked lift cables
- A broken torsion spring (the large horizontal spring above the door) or a spring that's visibly uncoiled or separated
- The door has come off its tracks
- Pulleys that wobble, squeal, or show visible wear
- Bottom brackets that are bent, cracked, or pulling away from the door
- The opener fails the auto-reverse test after you've cleaned the sensors
Never DIY these repairs:
- Torsion spring adjustment or replacement
- Lift cable replacement
- Bottom bracket repair (these are bolted directly to the cable drum system under load)
- Track realignment when the door is under tension
Ballpark costs for common pro services (rates vary by region and provider):
- Torsion spring replacement: roughly $150–$350 for a single spring, including labor
- Lift cable repair: roughly $100–$200
- Full professional tune-up: roughly $75–$150
These are ranges, not guarantees. Local labor rates in the Kansas City area will differ from national averages.
Before you call: take a short video of the problem, note whether the door is stuck open or closed, and write down any sounds you heard before the failure. A technician can diagnose faster with that information in hand.
Pro Tip: If the door is stuck open, clamp locking pliers onto the track below the bottom roller before you do anything else. That prevents an accidental drop while you wait for help.
For a broader look at DIY door pitfalls and when replacement makes more sense than repair, that resource covers the decision clearly.
How do you choose the right replacement parts?
Matching parts to your door matters more than most homeowners expect. A roller that fits a 2-inch track won't work in a 3-inch track, and a bottom seal cut for a flat floor won't seal a sloped driveway.
Start with your door's specs. The manufacturer label is usually on the inside of the top panel or on the opener motor unit. It lists the door model, weight, and sometimes the spring specifications. Photograph it before you go shopping.
Rollers: standard residential doors use 2-inch rollers with 4-inch stems. Steel rollers are cheaper but louder; nylon rollers with sealed bearings run quieter and last longer. If your door is heavy (double-car, solid wood, or insulated steel), choose 11-ball-bearing nylon rollers rated for higher cycle counts.
Weatherstripping and bottom seals: measure the width of your door and the profile of the existing retainer channel before buying. Bottom seals come in T-slot, nail-on, and bulb profiles. Match the profile to your retainer, or you'll spend an hour forcing the wrong seal into place.
Springs: do not buy and install torsion springs yourself. If you need spring specs for a conversation with a technician, the label on the existing spring lists wire diameter, inside diameter, and length. Share that with the pro.
Opener parts: remote controls, keypads, and safety sensors are model-specific. Check the opener's model number (printed on the motor unit) and buy from the manufacturer's parts program or a home center that stocks that brand. Generic remotes often work but may not support all safety features.
For common handyman fixes that overlap with garage door upkeep, that resource covers basic hardware replacement in more detail.
How do you reset or calibrate a garage door opener?
Most opener resets follow the same general sequence, though the exact button layout varies by brand. Consult your owner's manual for model-specific steps.
- Locate the "Learn" button on the motor unit. It's usually on the back or side panel, often colored (red, yellow, orange, or purple depending on the brand).
- Press and hold the Learn button for about 6 seconds until the indicator light goes out. This clears all programmed remotes and keypads from memory.
- Reprogram your remote: press the Learn button once (light comes on), then within 30 seconds press the button on your remote that you want to use. The opener light will flash or click to confirm the new code is stored.
- Reprogram the keypad: press Learn once, then enter your chosen PIN on the keypad and press Enter. Confirm with a test cycle.
- Adjust travel limits if the door doesn't fully open or close. Most openers have two adjustment screws on the motor unit labeled "Up" and "Down" (or "Open" and "Close"). Turn each screw in small increments — a quarter turn at a time — and test after each adjustment. The door should open fully without straining the opener and close until the bottom seal makes even contact with the floor.
- Adjust force settings only if the door struggles to move or the auto-reverse is overly sensitive. Force screws are also on the motor unit. If adjusting force doesn't resolve an auto-reverse failure, call a technician — the issue may be mechanical, not electronic.
After any calibration, run both the auto-reverse test and the photo-eye test to confirm the safety systems are still functioning correctly.
Weatherproofing your garage door beyond the bottom seal
The bottom seal gets all the attention, but it's only one of four weatherproofing points on a residential door.
Side and top weatherstripping runs along the door frame (the stop molding). Over time it compresses, cracks, or pulls away from the frame. Replace it with a foam-backed vinyl strip cut to length — it's a straightforward nail-on or adhesive installation that takes about 20 minutes per side.
The door sections themselves can develop gaps if panels are dented or if the hinges connecting sections have loosened. A gap between sections lets cold air, insects, and moisture in even when the bottom seal is perfect. Tighten hinge bolts and check that each section sits flush against the next when the door is closed.
Threshold seals are installed on the garage floor rather than on the door. They create a second barrier below the bottom seal and are particularly useful on sloped driveways where the bottom seal can't make full contact. Peel-and-stick threshold seals are available at most home centers and require no special tools.
Insulation panels inside the door sections reduce heat transfer and condensation, which is a weatherproofing issue as much as an energy issue. Many steel doors accept retrofit insulation kits. Measure the panel recesses before buying — kits are sized to fit standard panel dimensions.
Garage door gaps at the sides are sometimes caused by the door being slightly out of square in the opening rather than by failed weatherstripping. If new stripping still shows daylight at the corners, the track spacing may need adjustment — that's a technician call.
DIY maintenance is smart. Knowing its limits is smarter.
Most of what's in this guide is genuinely within reach for a careful homeowner. Lubrication, sensor cleaning, weatherstrip replacement, tightening accessible hardware — none of that requires special training, and doing it consistently makes a real difference in how long a door lasts and how quietly it runs.
The part that trips people up is the middle ground: the task that looks simple but isn't. A torsion spring looks like a coil of metal. It stores enough energy to cause a serious injury if it releases unexpectedly. The same goes for lift cables and bottom brackets. The rule I'd give any homeowner is this: if the part you're looking at is connected to the spring system or is visibly under tension, close the door, step back, and call a licensed technician. That's not being overly cautious. That's reading the situation correctly.
The other thing worth saying: an annual professional tune-up isn't an admission that you can't handle your own home. It's the same logic as changing your own oil but still taking the car in for a brake inspection.
Maddladder handles the repairs you shouldn't do yourself

Maddladder's licensed technicians serve the Kansas City metro area with the kind of garage door work that falls outside the DIY zone: spring replacement, cable repair, track realignment, full annual tune-ups, and safety system inspections. Every visit includes a balance check, auto-reverse verification, lubrication of moving parts, and a written assessment of anything that needs attention.
For homeowners who'd rather hand off the whole maintenance calendar, Maddladder's subscription home maintenance plans cover recurring upkeep so nothing slips through the cracks. One-time repairs and full tune-ups are also available through the repair and replacement service page.
Getting a free estimate takes a few minutes. If your door failed the balance test, the auto-reverse test, or you spotted frayed cables during your last inspection, that's the right time to reach out.