TL;DR:
- Drywall damage varies by size and type, influencing whether patching or replacement is needed.
- Proper technique, including thin coats, priming, and texture matching, ensures invisible, durable repairs.
- Hiring professionals is recommended for large, water-damaged, or textured wall repairs to prevent future issues.
Spot a fist-sized hole in the living room wall during a rental walkthrough, and your stomach drops. Whether you're a renter worried about your deposit or a landlord preparing a unit for turnover, drywall damage is one of the most common and stressful maintenance problems in Kansas City rentals. Between the metro area's humidity swings and cold winters, walls take a beating from normal use and seasonal stress. The good news is that most drywall repairs are manageable with the right process, the right materials, and a clear understanding of when to call in a professional. This guide walks you through everything you need to know.
Table of Contents
- Assessing drywall damage in your rental property
- Step-by-step repair for small and medium holes
- Handling large holes, water damage, and mold
- Matching textures and finishing for invisible repairs
- Kansas City rental best practices: Communication and when to hire a pro
- The expert angle: Why process matters more than products
- Get help with drywall repair in Kansas City
- Frequently asked questions
Key Takeaways
| Point | Details |
|---|---|
| Know your damage type | Small holes need patching, while large or moldy areas should be replaced for safety and appearance. |
| Step-by-step pays off | Thin compound coats, proper texture, and matching paint are essential for invisible repairs in rentals. |
| Communication is key | Always inform your landlord and document damages to protect deposits and avoid disputes. |
| Season matters in Kansas City | Plan major repairs for late winter or early spring when weather-related wall problems are most apparent. |
| Pros for complex jobs | Hire professionals for large, water-damaged, or textured repairs to avoid losing your deposit. |
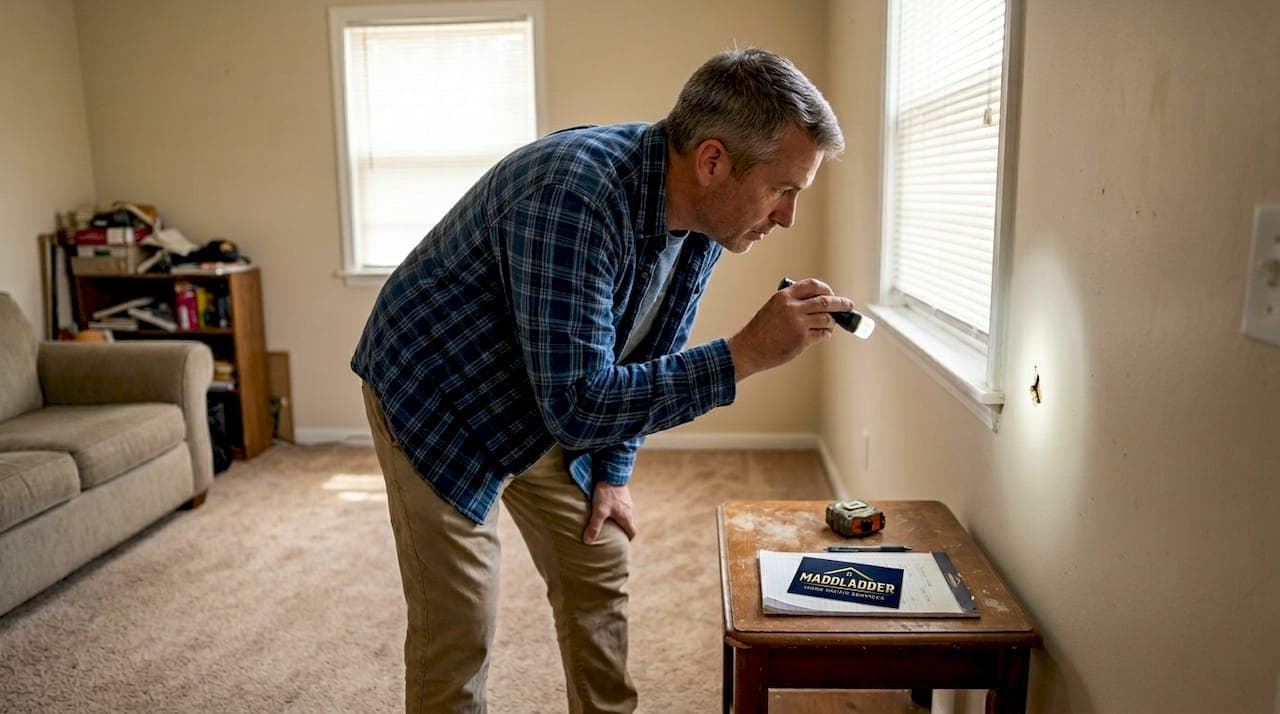
Assessing drywall damage in your rental property
Before you buy a single tube of spackling compound, you need to understand what you're dealing with. Not all wall damage is created equal, and the repair method changes significantly based on the size and type of damage.
Here's a simple way to categorize what you're looking at:
- Small damage (under 1/2 inch): Nail holes, small screw anchors, or minor scrapes. These are cosmetic issues and the easiest to fix.
- Medium damage (1/2 to 4 inches): Doorknob punctures, dents from furniture, or stress cracks from settling. Manageable as a DIY project with the right patch kit.
- Large damage (over 4 inches): Accidental impacts, holes from plumbing access, or damage from removed fixtures. Large holes require wood backing, a drywall patch, tape, multiple coats of joint compound, texture matching, priming, and painting.
- Water or mold damage: This is a separate category entirely. Soft, discolored, or crumbling drywall near windows, ceilings, or exterior walls often signals a moisture problem underneath.
Kansas City renters and landlords should pay special attention to Kansas City drywall repair types because the local climate adds a specific layer of complexity. Humidity in summer causes drywall to expand slightly, while dry winter air causes it to contract. Over time, this cycle produces hairline cracks and nail pops that are easy to overlook until they become obvious.
A reliable rule of thumb: patch if under 6 inches, isolated, and dry; replace if more than 50% of a sheet is damaged, if there's mold present, or if the board is sagging. Ceiling damage and textured walls are situations where professional help is almost always worth the cost.
Before starting any repair, use the drywall repair checklist to make sure you haven't missed anything. A missed step early on often shows up as a visible patch later.
Pro Tip: Press firmly on the damaged area. If the surrounding drywall feels soft or gives slightly, you likely have moisture damage behind the wall, not just surface wear.
Step-by-step repair for small and medium holes
Once you've classified the damage, here's exactly how to handle the most common small and medium holes in drywall. Gather your materials first: lightweight spackling compound or pre-mixed joint compound, a putty knife, 120 to 220 grit sandpaper, primer, and matching paint.
For small holes (nail or screw sized, under 1/2 inch):
- Clean the area around the hole and remove any loose paper or debris.
- Apply a small amount of lightweight spackling compound using a putty knife, pressing it firmly into the hole.
- Let it dry 2 to 4 hours, then sand smooth with 120 to 220 grit sandpaper.
- Wipe away dust with a damp cloth.
- Apply a coat of primer and let it dry completely.
- Paint to match, including the sheen level of the surrounding wall.
For medium holes (1/2 to 4 inches, like a doorknob punch-through):
- Clean up any jagged edges around the hole.
- Apply a self-adhesive mesh patch over the hole, pressing firmly to the wall.
- Apply joint compound in thin layers, feathering the edges outward. Do not glob it on thick.
- Let each coat dry 2 to 4 hours before applying the next. Plan for 2 to 3 coats total.
- Sand lightly between coats to keep the surface level.
- Match texture if the wall has any (more on this in the next section).
- Prime and paint to finish.
"The most common DIY mistake is applying compound too thick in one coat. Thin layers dry properly and bond better, giving you a flatter, more invisible result."
The step-by-step home repairs guide from MaddLadder covers additional scenarios for Kansas City homes, including how to handle older plaster walls that look like drywall but behave differently.
Pro Tip: Check the closet or utility room for leftover paint from the original unit. Landlords often store touch-up paint there. Using the same batch gives you the closest color and sheen match possible.
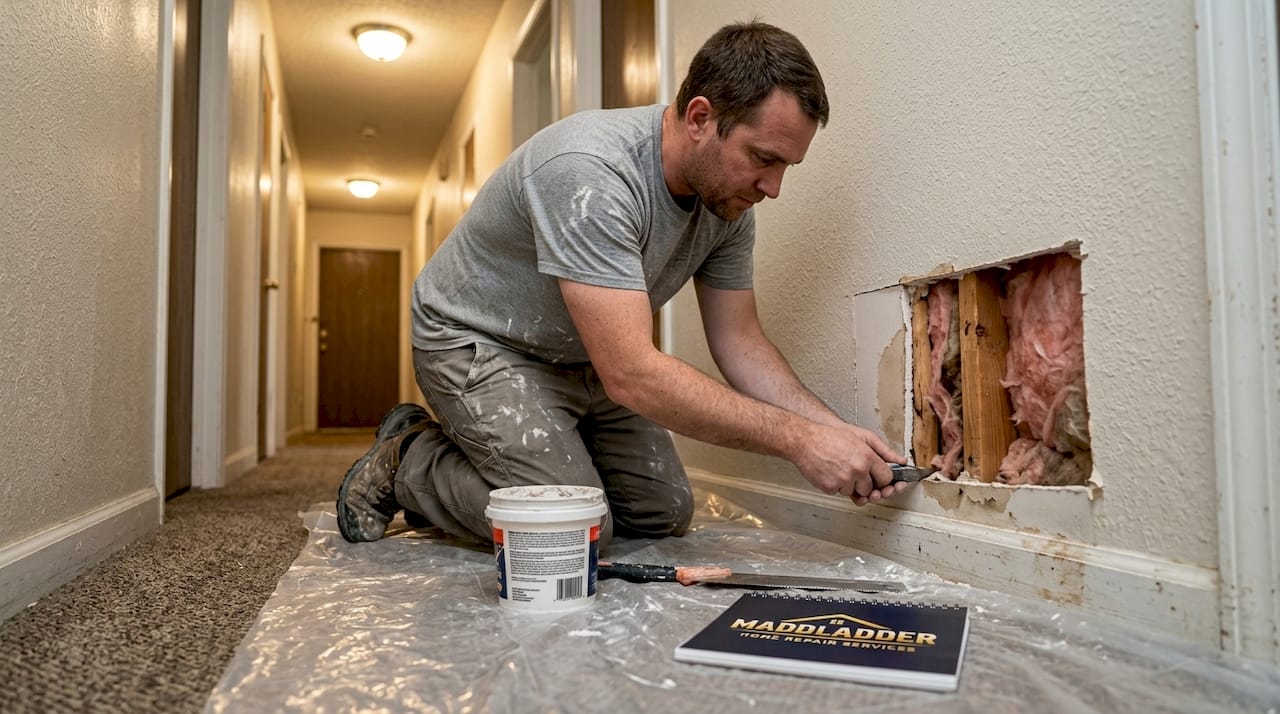
Handling large holes, water damage, and mold
But what about bigger issues, like gaping holes or signs of moisture? Here's how to tackle serious drywall problems safely.
For holes larger than 4 inches, the process is more involved but still manageable for a handy renter or landlord:
- Cut a clean square around the damaged area using a drywall saw.
- Install wood backing strips behind the opening by screwing them to the existing drywall on each side.
- Cut a drywall patch to fit the opening precisely.
- Secure the patch to the wood backing with drywall screws.
- Tape the seams with paper or mesh drywall tape.
- Apply multiple thin coats of joint compound, feathering each coat wider than the last.
- Sand, match texture, prime, and paint the entire wall section.
Water damage requires a different approach entirely. The critical rule is to never cover over water-damaged or moldy drywall. Covering it traps moisture and makes the problem significantly worse.
| Damage type | Patch or replace? | Pro required? |
|---|---|---|
| Nail holes | Patch | No |
| Medium holes (under 4 inches) | Patch | Usually no |
| Large holes (over 4 inches) | Patch with backing | Sometimes |
| Water damage, isolated | Replace section | Recommended |
| Mold present | Replace section | Yes |
| Over 50% of sheet damaged | Full replacement | Yes |
If you find soft, discolored, or crumbling drywall, cut out the affected area down to solid board, fix the moisture source first, and then replace with new drywall. Skipping the moisture fix guarantees the problem returns within months.
For Kansas City landlords, mold in a rental unit carries serious legal and health implications. When in doubt, schedule professional repairs rather than risk a larger issue going unaddressed.
Matching textures and finishing for invisible repairs
After repairing the hole, the finishing step often makes or breaks a truly invisible drywall fix. A technically perfect patch that doesn't match the surrounding texture stands out like a sore thumb, especially in older Kansas City rental units with knockdown or orange peel finishes.
Here's how to match common textures:
"Texture mismatch leaves obvious patches. After patching, spray texture to match the wall, then cut with a knockdown knife after 5 to 10 minutes before it fully dries. Practice on cardboard first."
| Texture type | How to replicate | Tool needed |
|---|---|---|
| Smooth | Skim coat with compound | Wide putty knife |
| Orange peel | Light spray can texture | Texture spray can |
| Knockdown | Spray then flatten with knife | Knockdown knife |
| Skip trowel | Hand-applied compound | Trowel |
A few finishing rules that make a real difference:
- Always prime before painting. Unprimed drywall compound absorbs paint unevenly, creating a dull spot called flashing even if the texture matches perfectly.
- Paint the full section or wall rather than spot painting. A single painted patch almost never matches the surrounding wall color exactly, especially in units with aged or faded paint.
- Let primer dry completely before applying paint. Rushing this step is one of the most common reasons a repair looks obvious after it dries.
The Kansas City repair checklist includes a texture matching guide that helps you identify what type of finish is on your walls before you start.
Pro Tip: Before spraying any texture, shake the can for a full 60 seconds and test on a scrap piece of cardboard. Temperature affects how the spray spreads, so work in a room that's at least 60 degrees Fahrenheit.
Kansas City rental best practices: Communication and when to hire a pro
Flawless repairs don't just depend on your skill. They also require clear processes and smart decisions about who handles the work.
For renters, the most important step happens before you pick up a putty knife. Notify your landlord before starting any repairs, review your lease for repair clauses, and document the damage with photos before and after. Some leases prohibit tenant repairs entirely, which means starting without permission could cost you your deposit regardless of how good the repair looks.
Best practices for both renters and landlords:
- Photograph all damage before repairs begin.
- Keep receipts for all materials purchased.
- Note the date repairs were completed.
- Store leftover paint and compound for future touch-ups.
- Confirm in writing if a landlord approves a renter's DIY repair.
Kansas City's humidity and winter cycles regularly cause cracks and nail pops, and late winter to early spring is the best window for major repairs. By then, the drywall has fully contracted from winter dryness, and warming temperatures create ideal drying conditions for compound and paint.
Knowing when to stop DIYing and call a professional saves money in the long run. Hire a pro when:
- The hole is larger than 4 inches and on a ceiling.
- The repair involves textured walls and an exact match is critical.
- There is any sign of mold or ongoing moisture.
- The repair is in a high-visibility area, like an entry hallway or living room.
The Kansas City handymen guide covers what to look for when selecting a licensed professional and how to get accurate estimates before committing.
Pro Tip: If you're a landlord managing multiple units, document every repair with photos and receipts in a shared folder organized by unit number. This creates a paper trail that protects you in deposit disputes.
The expert angle: Why process matters more than products
Here's something that rarely gets said in drywall repair guides: the product you use matters far less than the process you follow. We see this play out constantly in Kansas City rentals. A renter buys a premium patching compound, skips the priming step because it seems unnecessary, applies one thick coat instead of three thin ones, and ends up with a repair that cracks within two months.
The cost-effective repair tips that actually hold up over time share one thing in common: they follow the process without cutting corners. Priming is not optional. Thin coats are not a preference. Texture matching is not decorative. Each step exists because skipping it causes a specific, predictable failure.
Kansas City's seasonal swings make this even more critical. A repair done in a rush during a humid August afternoon will behave differently than one done in optimal late-winter conditions. Timing is a real variable, not a minor detail. The best advice we can give landlords and renters alike: slow down, follow the steps, and let each layer do its job.
Get help with drywall repair in Kansas City
Sometimes the damage is beyond a DIY fix, or you simply need the job done right the first time without the trial and error.

MaddLadder's repair and replacement services cover everything from small patch jobs to full drywall section replacements, with licensed professionals who understand Kansas City's specific construction and climate conditions. Landlords managing multiple properties can take advantage of turnover punch list help to get units rent-ready fast between tenants. Whether you're dealing with one stubborn hole or preparing a whole unit for turnover, the Kansas City home repair experts at MaddLadder offer free estimates, transparent pricing, and fast scheduling to make the process straightforward.
Frequently asked questions
Can renters repair drywall themselves in Kansas City?
Yes, renters can handle minor drywall damage on their own, but notify your landlord before starting and review your lease to make sure repairs are permitted.
How do you fix a doorknob-sized hole in drywall?
Apply a self-adhesive mesh patch over the hole, cover with thin layers of compound feathered outward, sand between coats, match texture, then prime and paint to finish.
When should I hire a professional for drywall repair?
Hire a pro for large holes, water damage, mold, or when you need to match difficult textures to avoid visible patches and protect your deposit.
What causes recurring drywall cracks in Kansas City rentals?
Kansas City's humidity and winter cycles cause seasonal expansion and contraction in drywall, leading to recurring cracks and nail pops over time.
How can I ensure my drywall patch won't be visible after painting?
Feather compound edges widely, match the wall texture carefully, always prime before painting, and repaint the full section to avoid color or sheen mismatches.