
A flawless drywall repair sounds simple until you step back and notice a ghost seam running across your wall or a texture patch that looks like a thumbprint. For Kansas City homeowners and landlords, a botched repair can mean tenant complaints, lost security deposits, or a buyer walking away from a sale. The good news is that most failures come down to skipping steps, not lack of skill. This checklist covers every stage of the process so your repairs hold up, blend in, and stay that way.
Table of Contents
- Essential tools and materials for drywall repair
- Step-by-step drywall repair checklist
- Drywall repair edge cases and when to call a pro
- Typical costs and timeframes for drywall repair jobs
- Drywall repair checklist for Kansas City rentals and humid climates
- Get professional drywall help in Kansas City
- Frequently asked questions
Key Takeaways
| Point | Details |
|---|---|
| Have the right tools | Proper tools and materials are essential for seamless drywall repairs. |
| Follow every checklist step | Skipping preparation or sanding leads to poor results and visible patches. |
| Know your DIY limits | Call a pro for water damage, ceilings, big cracks, or when texture matters. |
| Plan for real costs | Budget for $50 to $2,500 depending on repair size and complexity. |
| Adjust for Kansas City climate | Control humidity and inspect rental walls regularly to prevent repeat repairs. |
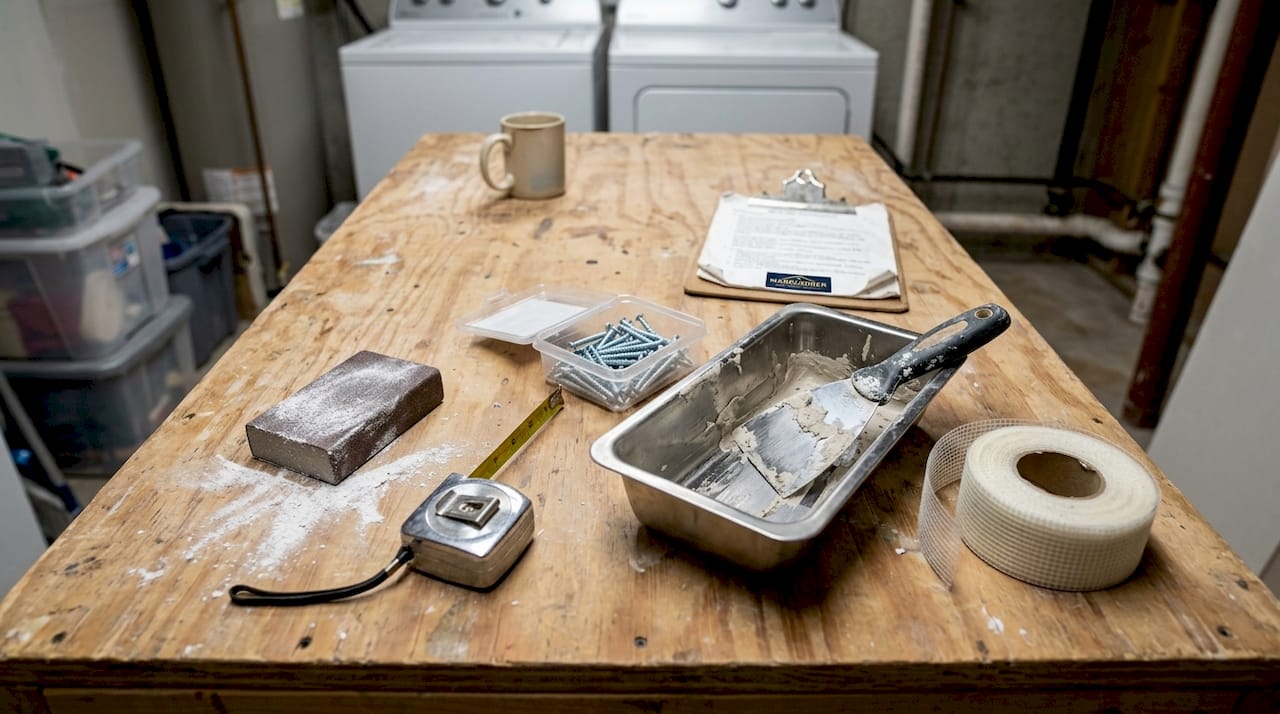
Essential tools and materials for drywall repair
Before you touch a wall, gather everything you need. Running back to the hardware store mid-repair is how mistakes happen. Drywall repair checklists emphasize a specific set of tools for seamless finishes, and skipping even one can show in the final result.
Here is what you need on hand:
- Putty knife (4-inch and 6-inch): Use these to apply and feather joint compound. The wider knife helps you blend edges so the repair fades into the surrounding wall.
- 120-grit sandpaper or sanding sponge: Sand lightly between every coat. Skipping this step is the number one reason repairs look lumpy.
- Drywall saw or utility knife: For cutting out damaged sections cleanly. A ragged edge makes patching much harder.
- Pre-mixed joint compound: Best for larger repairs, cracks, and anything that needs multiple coats. It shrinks as it dries, so thin coats are key.
- Spackle: Great for small nail holes and minor dings. It dries faster than joint compound but is not as strong for bigger jobs.
- Drywall mesh tape vs paper tape: Mesh tape is self-adhesive and easier for beginners. Paper tape is stronger and less likely to crack over time, making it the better choice for seams and stress points.
- Primer: Never skip priming before painting. Unprimed compound soaks up paint unevenly and leaves a dull spot called flashing.
- Matching paint: Bring a chip or use a color-matching app. Even a slight shade difference will stand out.
- Dust mask and drop cloths: Drywall dust is fine and gets everywhere. Protect your lungs and your floors.
Keeping up with home repair trends means knowing that quality materials pay off. Cheap joint compound or bargain sandpaper will cost you more time than they save in dollars.
Step-by-step drywall repair checklist
With your tools ready, it is time for a step-by-step workflow that prevents the common mistakes many Kansas City property owners encounter. Following a process that improves adhesion, blending, and finish leads to seamless repairs every time.
- Prep the area. Clear furniture, lay drop cloths, and put on your dust mask. Turn off any nearby ceiling fans to keep dust from spreading.
- Cut away loose or damaged drywall. Use your drywall saw to create clean, straight edges around the damaged area. Jagged edges do not hold compound well.
- For cracks, widen to a V-shape. Widening cracks to a V-shape helps compound grip better and prevents the crack from reappearing through the surface.
- Secure mesh or paper tape. Press tape firmly over the repair area. For holes larger than a quarter, use a backer board or drywall patch kit to give the compound something solid to grip.
- Apply the first thin coat of joint compound. Thin is the word here. A thick first coat will crack as it dries. Feather the edges out several inches beyond the repair.
- Let it dry completely, then sand lightly. Do not rush this. In Kansas City's humid summers, drying can take longer than the package suggests.
- Apply a second coat, slightly wider than the first. Each coat should extend a bit further to blend the repair into the wall.
- Sand again, then apply a third coat if needed. Most repairs need two to three coats for a smooth, invisible finish.
- Prime the repaired area. Use a drywall primer or PVA primer before painting. This step prevents flashing.
- Paint and match texture. If your walls have a texture like orange peel or knockdown, practice on scrap drywall before applying it to the repair. Mismatched texture is the most common giveaway of a DIY job.
Pro Tip: Kansas City humidity swings between seasons. Keep interior humidity between 30 and 50 percent while your compound dries. A portable dehumidifier in summer or a humidifier in winter can make a real difference in how your repair cures and holds. Staying on top of routine maintenance tips like humidity control protects your whole home, not just your drywall.
Drywall repair edge cases and when to call a pro
While basic drywall fixes cover most situations, some scenarios require special care or professional support. Knowing the difference between a DIY job and a pro job can save you from a much bigger repair bill later.
- Water-damaged drywall: Always find and fix the leak source before you touch the wall. Patching over wet or water-stained drywall is a waste of time. The damage will return, and mold may follow.
- Mold growth: If mold covers more than 10 square feet, do not attempt to handle it yourself. Professional remediation is the safe and legally sound choice for landlords especially.
- Sagging or structurally compromised drywall: Sagging panels cannot be patched. They need full replacement, and you should check what caused the sag before installing new drywall.
- Recurring cracks wider than 1/8 inch: These are a red flag. They may point to foundation settling or structural movement. Patching them without addressing the cause is a short-term fix at best.
- Ceiling repairs: Gravity works against you on ceilings. Compound sags, texture is harder to match, and the work is physically demanding. Certain cases such as water damage, large cracks, structural issues, and ceilings are best left to professionals.
Know when to stop. If you have patched the same crack twice in 12 months, the problem is not the patch. It is what is behind the wall. A professional inspection can tell you whether you are dealing with normal settling or something that needs structural attention.
For Kansas City landlords, property safety upgrades and proactive repairs protect your investment and your tenants. Learning to fix drywall cracks correctly the first time is always cheaper than dealing with a recurring problem.
Typical costs and timeframes for drywall repair jobs
Understanding when to DIY and when to call an expert is easier when you also know what to expect for costs and time. Here is a realistic breakdown based on Kansas City drywall prices and national benchmarks.
| Repair type | DIY cost | Pro cost (KC average) | Typical timeframe |
|---|---|---|---|
| Small hole (under 6 inches) | $10 to $30 | $50 to $150 | 1 to 2 hours |
| Medium hole or crack repair | $20 to $60 | $150 to $400 | 2 to 4 hours |
| Large section replacement | $50 to $150 | $400 to $900 | Half-day to full day |
| Full room repair or skim coat | $100 to $300 | $500 to $2,500 | 1 to 3 days |
| Ceiling repair (any size) | Not recommended | $200 to $1,000+ | Half-day to full day |
According to repair drywall cost data, labor makes up 50 to 70 percent of the total cost for professional drywall work. That means the materials themselves are not the big expense. You are paying for skill, speed, and a finish that blends.
Statistic to know: Homeowners who attempt a DIY repair and then hire a pro to fix it spend an average of 40 percent more than if they had called a pro first. That is because the contractor has to undo the failed patch before starting fresh.
DIY makes sense for small holes, nail pops, and minor cracks. For anything involving texture matching, ceilings, or water damage, the math usually favors hiring out. Check out improvement value examples and home upgrade strategies to see how smart repairs add real value to your property.
Drywall repair checklist for Kansas City rentals and humid climates
With general costs and methods covered, let's end with some location-specific best practices for keeping your Kansas City properties sound. The metro area's mix of hot, humid summers and dry winters creates conditions that stress drywall more than most homeowners realize.
- Control interior humidity year-round. Run your AC in summer and a humidifier in winter to keep relative humidity between 30 and 50 percent. Humidity control at this range is critical for drywall health in KC climates.
- Inspect between tenants. Small dings and nail holes from picture hanging are easy to fix in an hour. Left alone, they collect moisture and grow into bigger problems.
- Document damage before and after tenancy. Photos taken at move-in and move-out protect you legally and make it easier to charge back legitimate repairs.
- Repair promptly. A small crack left alone through a Kansas City winter can open up significantly by spring. Fast action keeps repair costs low.
- Use contractors with texture matching experience. Not every handyman can match a knockdown or skip-trowel finish. Ask to see examples of previous texture work before hiring.
Pro Tip: For rental properties, consider scheduling a quick walk-through inspection every six months. Catching small drywall issues early is far cheaper than dealing with a full wall repair after a tenant moves out. Rental property inspection tips from local KC property managers confirm that proactive checks cut repair costs significantly over time.
Get professional drywall help in Kansas City
Some repairs are satisfying to handle yourself. Others just need a professional touch to look right and stay right.

At MaddLadder, we handle drywall repairs across the Kansas City metro area, from small patch jobs to full-room skim coats and ceiling work. Our team knows local textures, local humidity, and what landlords and homeowners actually need when a wall does not look right. We offer free estimates, quick response times, and pricing that starts at $75 per hour for one-time jobs. If you want a repair that blends and holds, explore our drywall services in Kansas City and request a free quote today. No guesswork, no callbacks, just walls that look like nothing ever happened.
Frequently asked questions
What is the most common mistake in DIY drywall repair?
Applying thick compound layers or skipping sanding between coats causes visible seams and bumps. Multiple thin coats and proper sanding between each one are what separate a seamless repair from an obvious patch.
Can I use spackle instead of joint compound for all repairs?
Spackle works well for small nail holes and minor surface dings, but joint compound is stronger for larger repairs and holds up better over time in high-traffic areas.
When should I definitely hire a drywall pro?
Hire a pro for water damage, large cracks, ceiling repairs, and any crack that keeps coming back after patching.
How can I blend a drywall repair with existing texture?
Practice your texture technique on scrap drywall before applying it to the wall. For complex finishes like knockdown or orange peel, a local pro with texture matching experience will save you a lot of frustration.
Do drywall repair costs differ much in Kansas City?
Kansas City costs align closely with the national average. Small repairs start around $50 and full-room projects can reach $2,500 depending on scope and finish complexity.